Remote Development with VS Code
You can use Visual Studio Code with CRCD in a couple of ways. Pick based on how much setup you can handle and whether you'd rather work in a browser or in your own local VS Code:
| Method | Where VS Code runs | Best when |
|---|---|---|
| Code Server | In your browser, via Open OnDemand | You want the quickest start with minimal installation |
| Remote tunnel | Your local VS Code, connected to a compute node | You want to use your own VS Code, extensions, and settings against cluster resources |
The first one run through Open OnDemand and need no local setup. The remote tunnel is the most powerful but the most involved.
Code-Server
Code-Server runs VS Code on a compute node and serves it to your browser.
Once you login to https://ondemand.htc.crc.pitt.edu using your Pitt credentials (username in lowercase + Pitt password), you can click on Code Server from the Pinned Apps (Step 1) to bring up a form (Step 2) where you can specify how many CPU cores you need and the duration of your session to Launch a job to the job scheduler (Step 3). After Slurm allocates the requested resource, you will be presented with a widget to Connect to VS Code (Step 4).
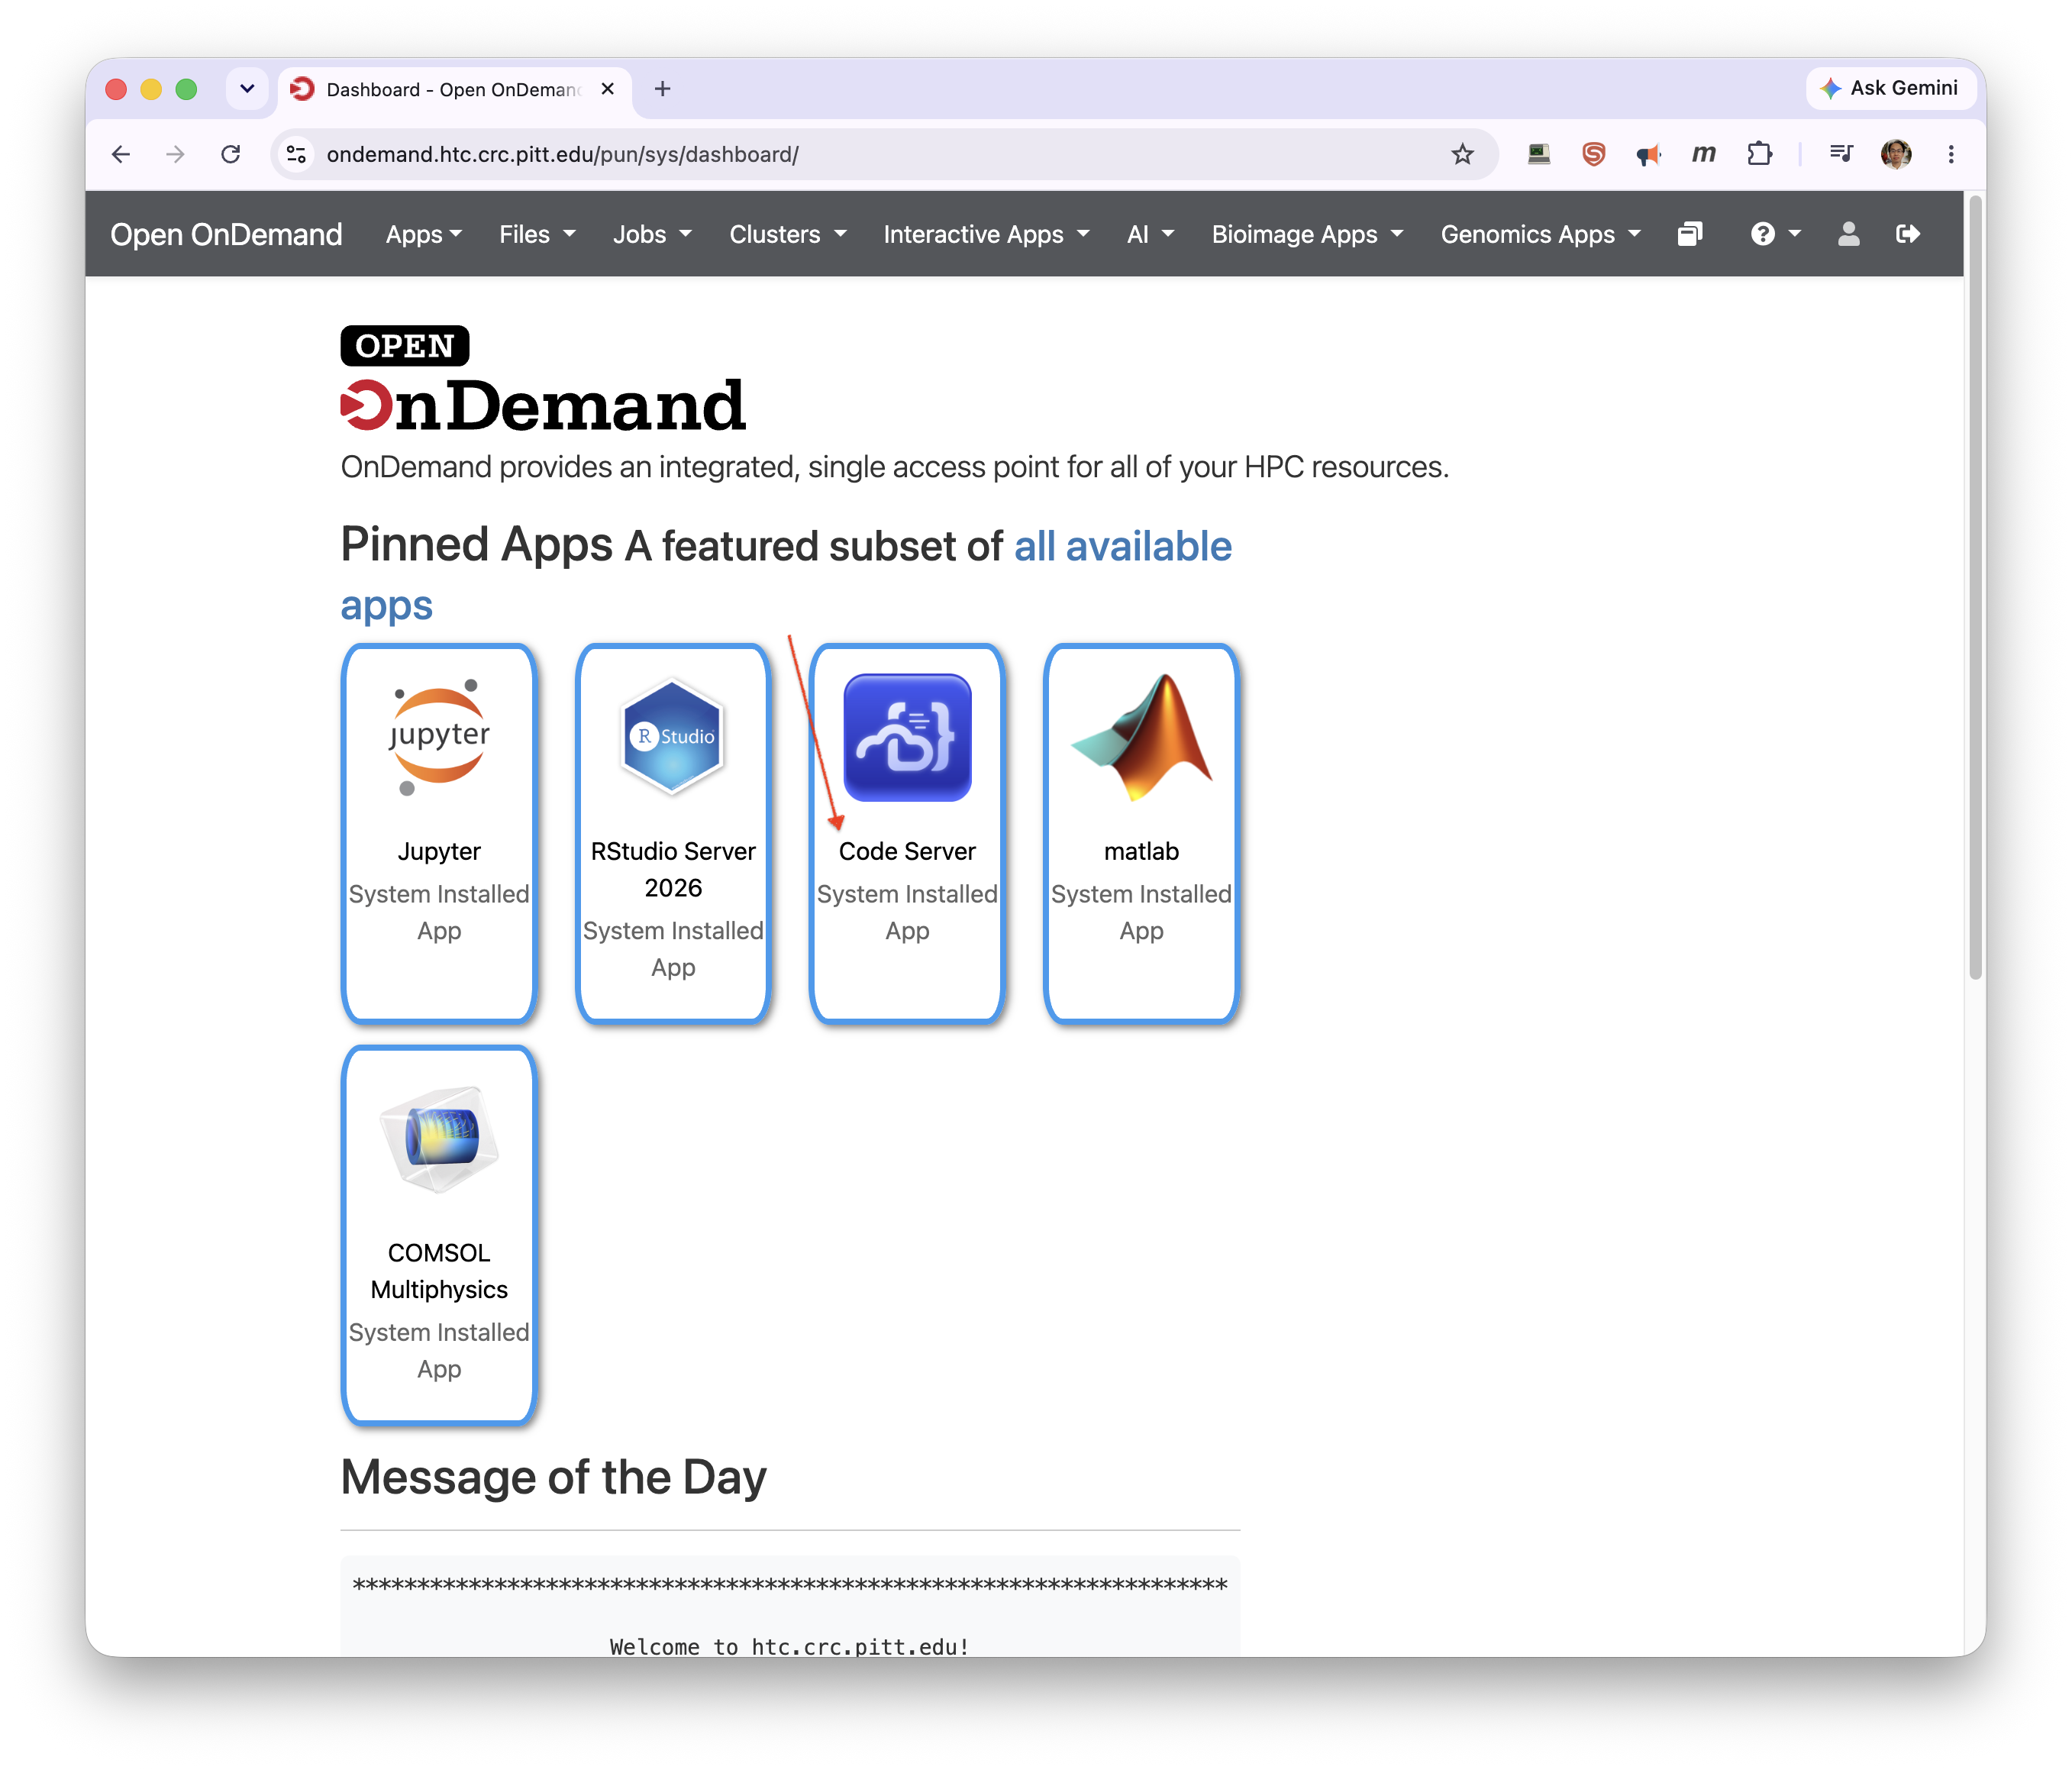
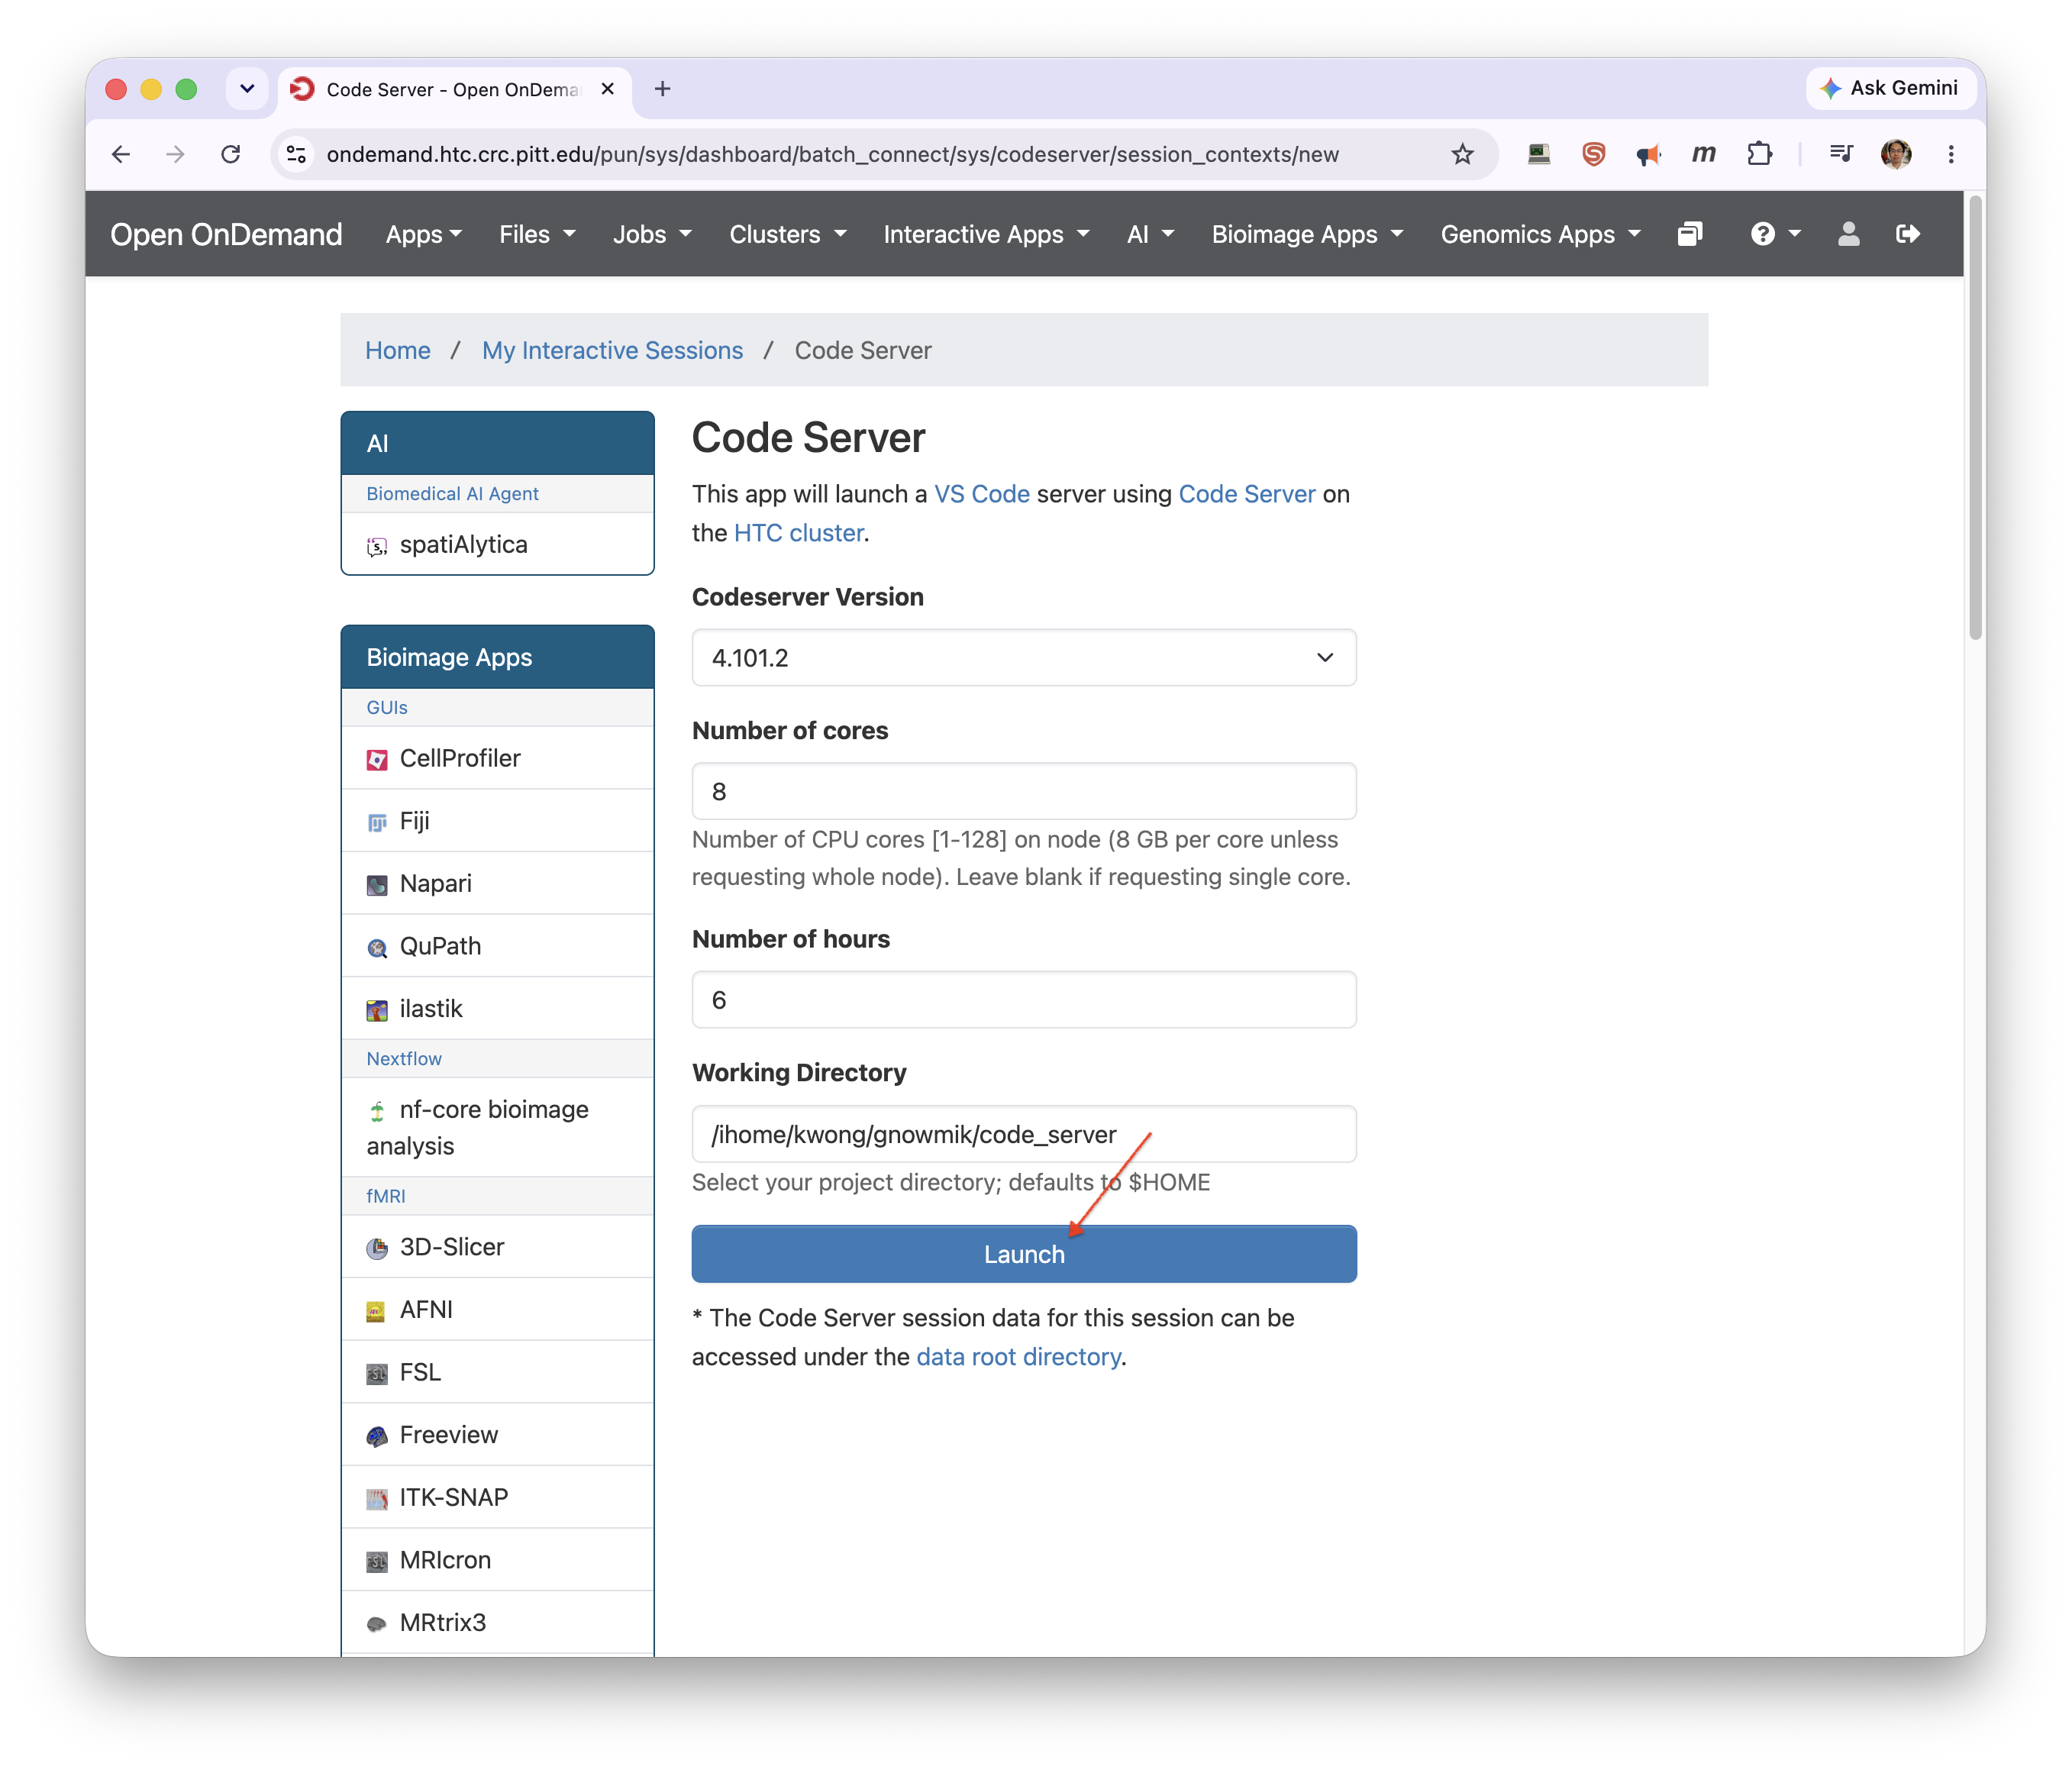
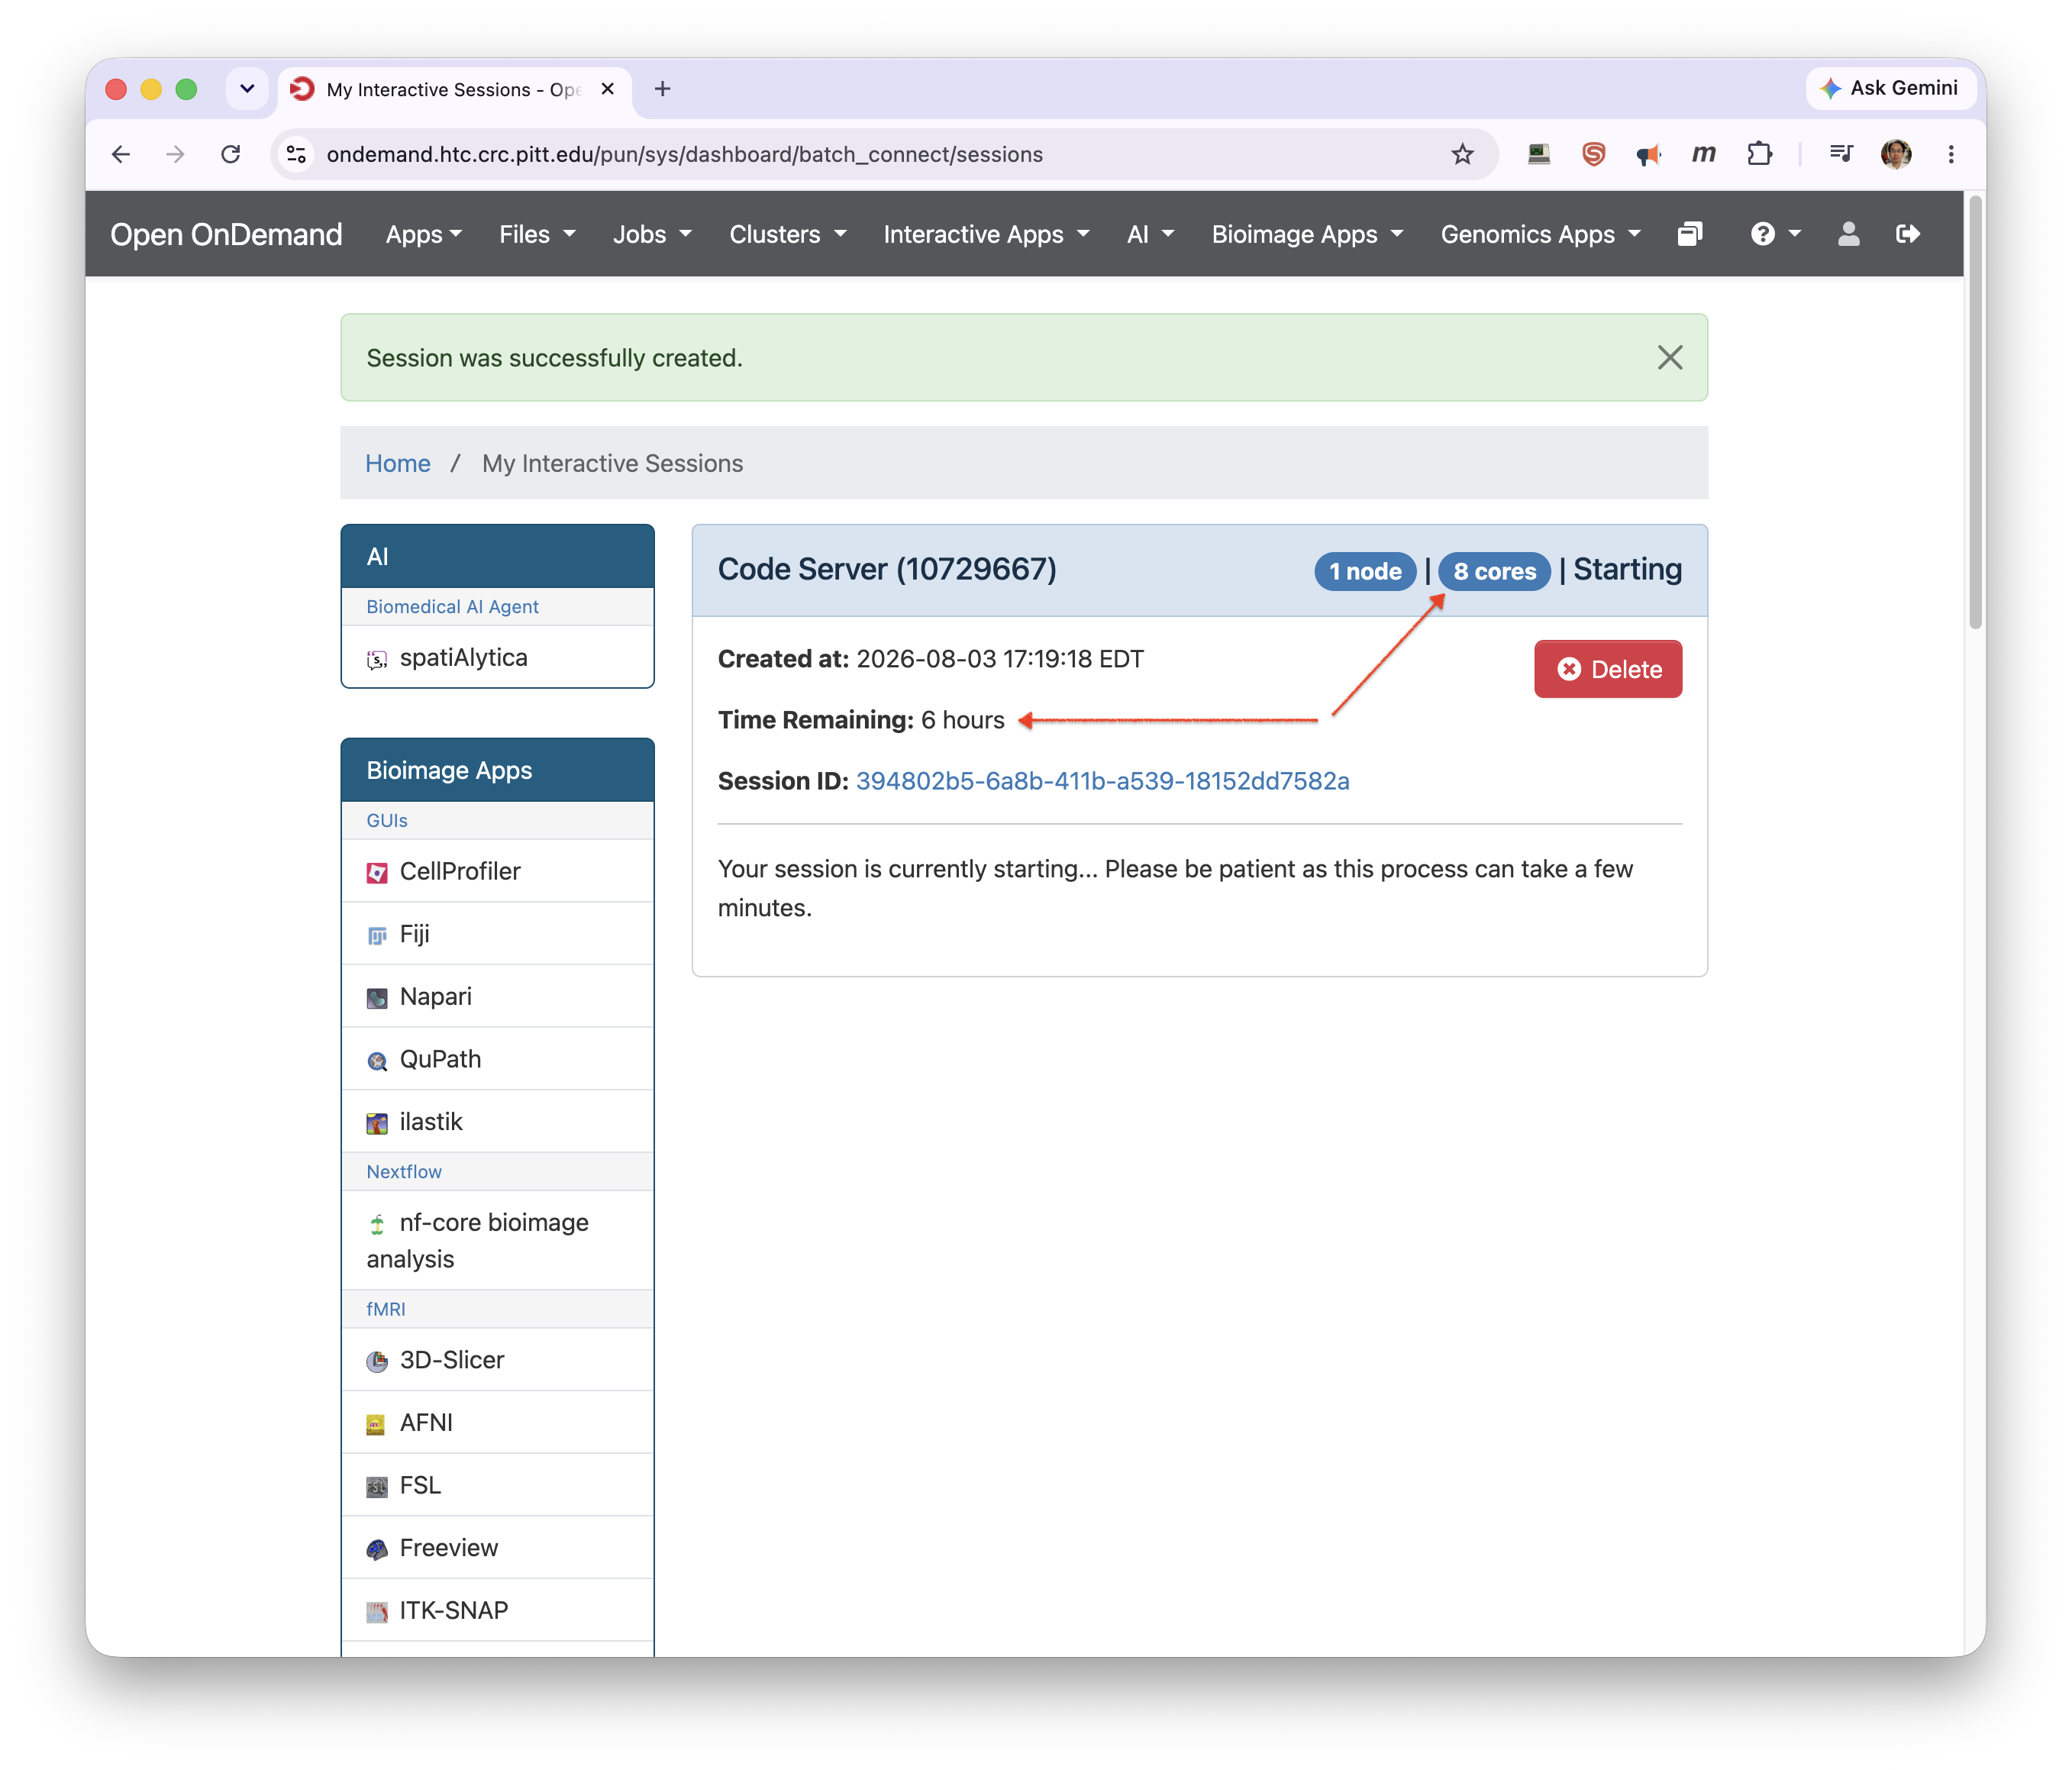
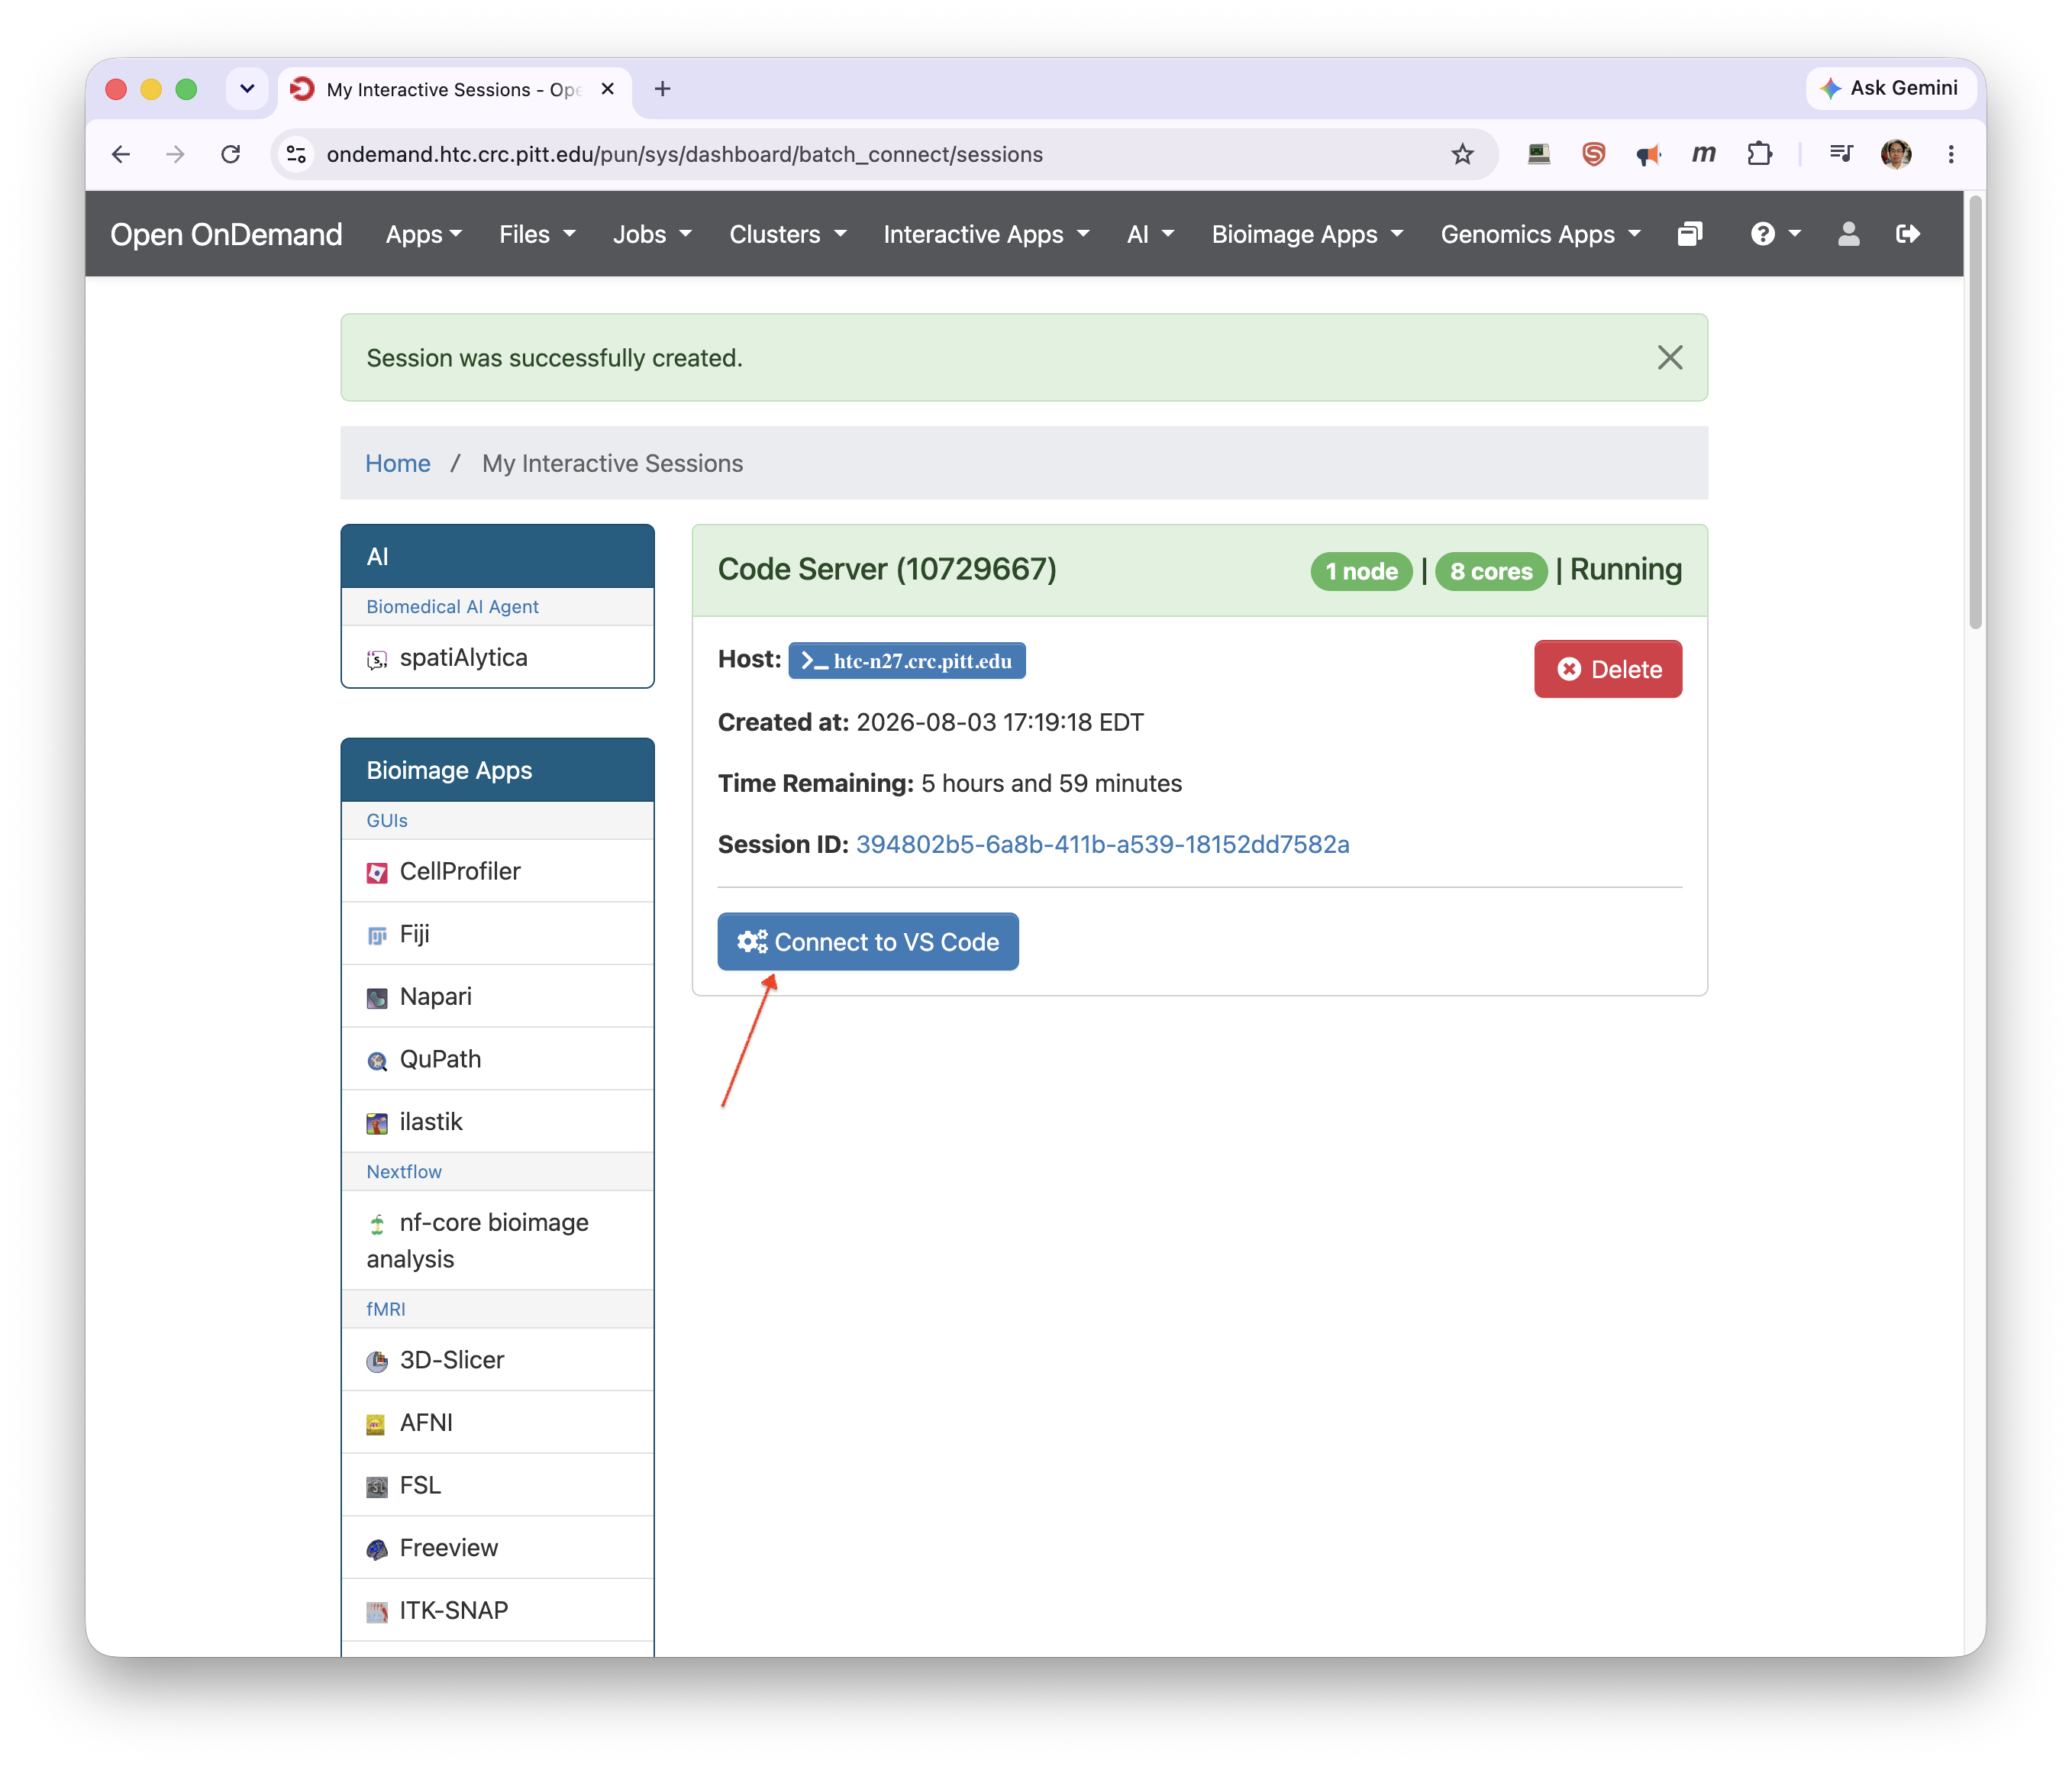
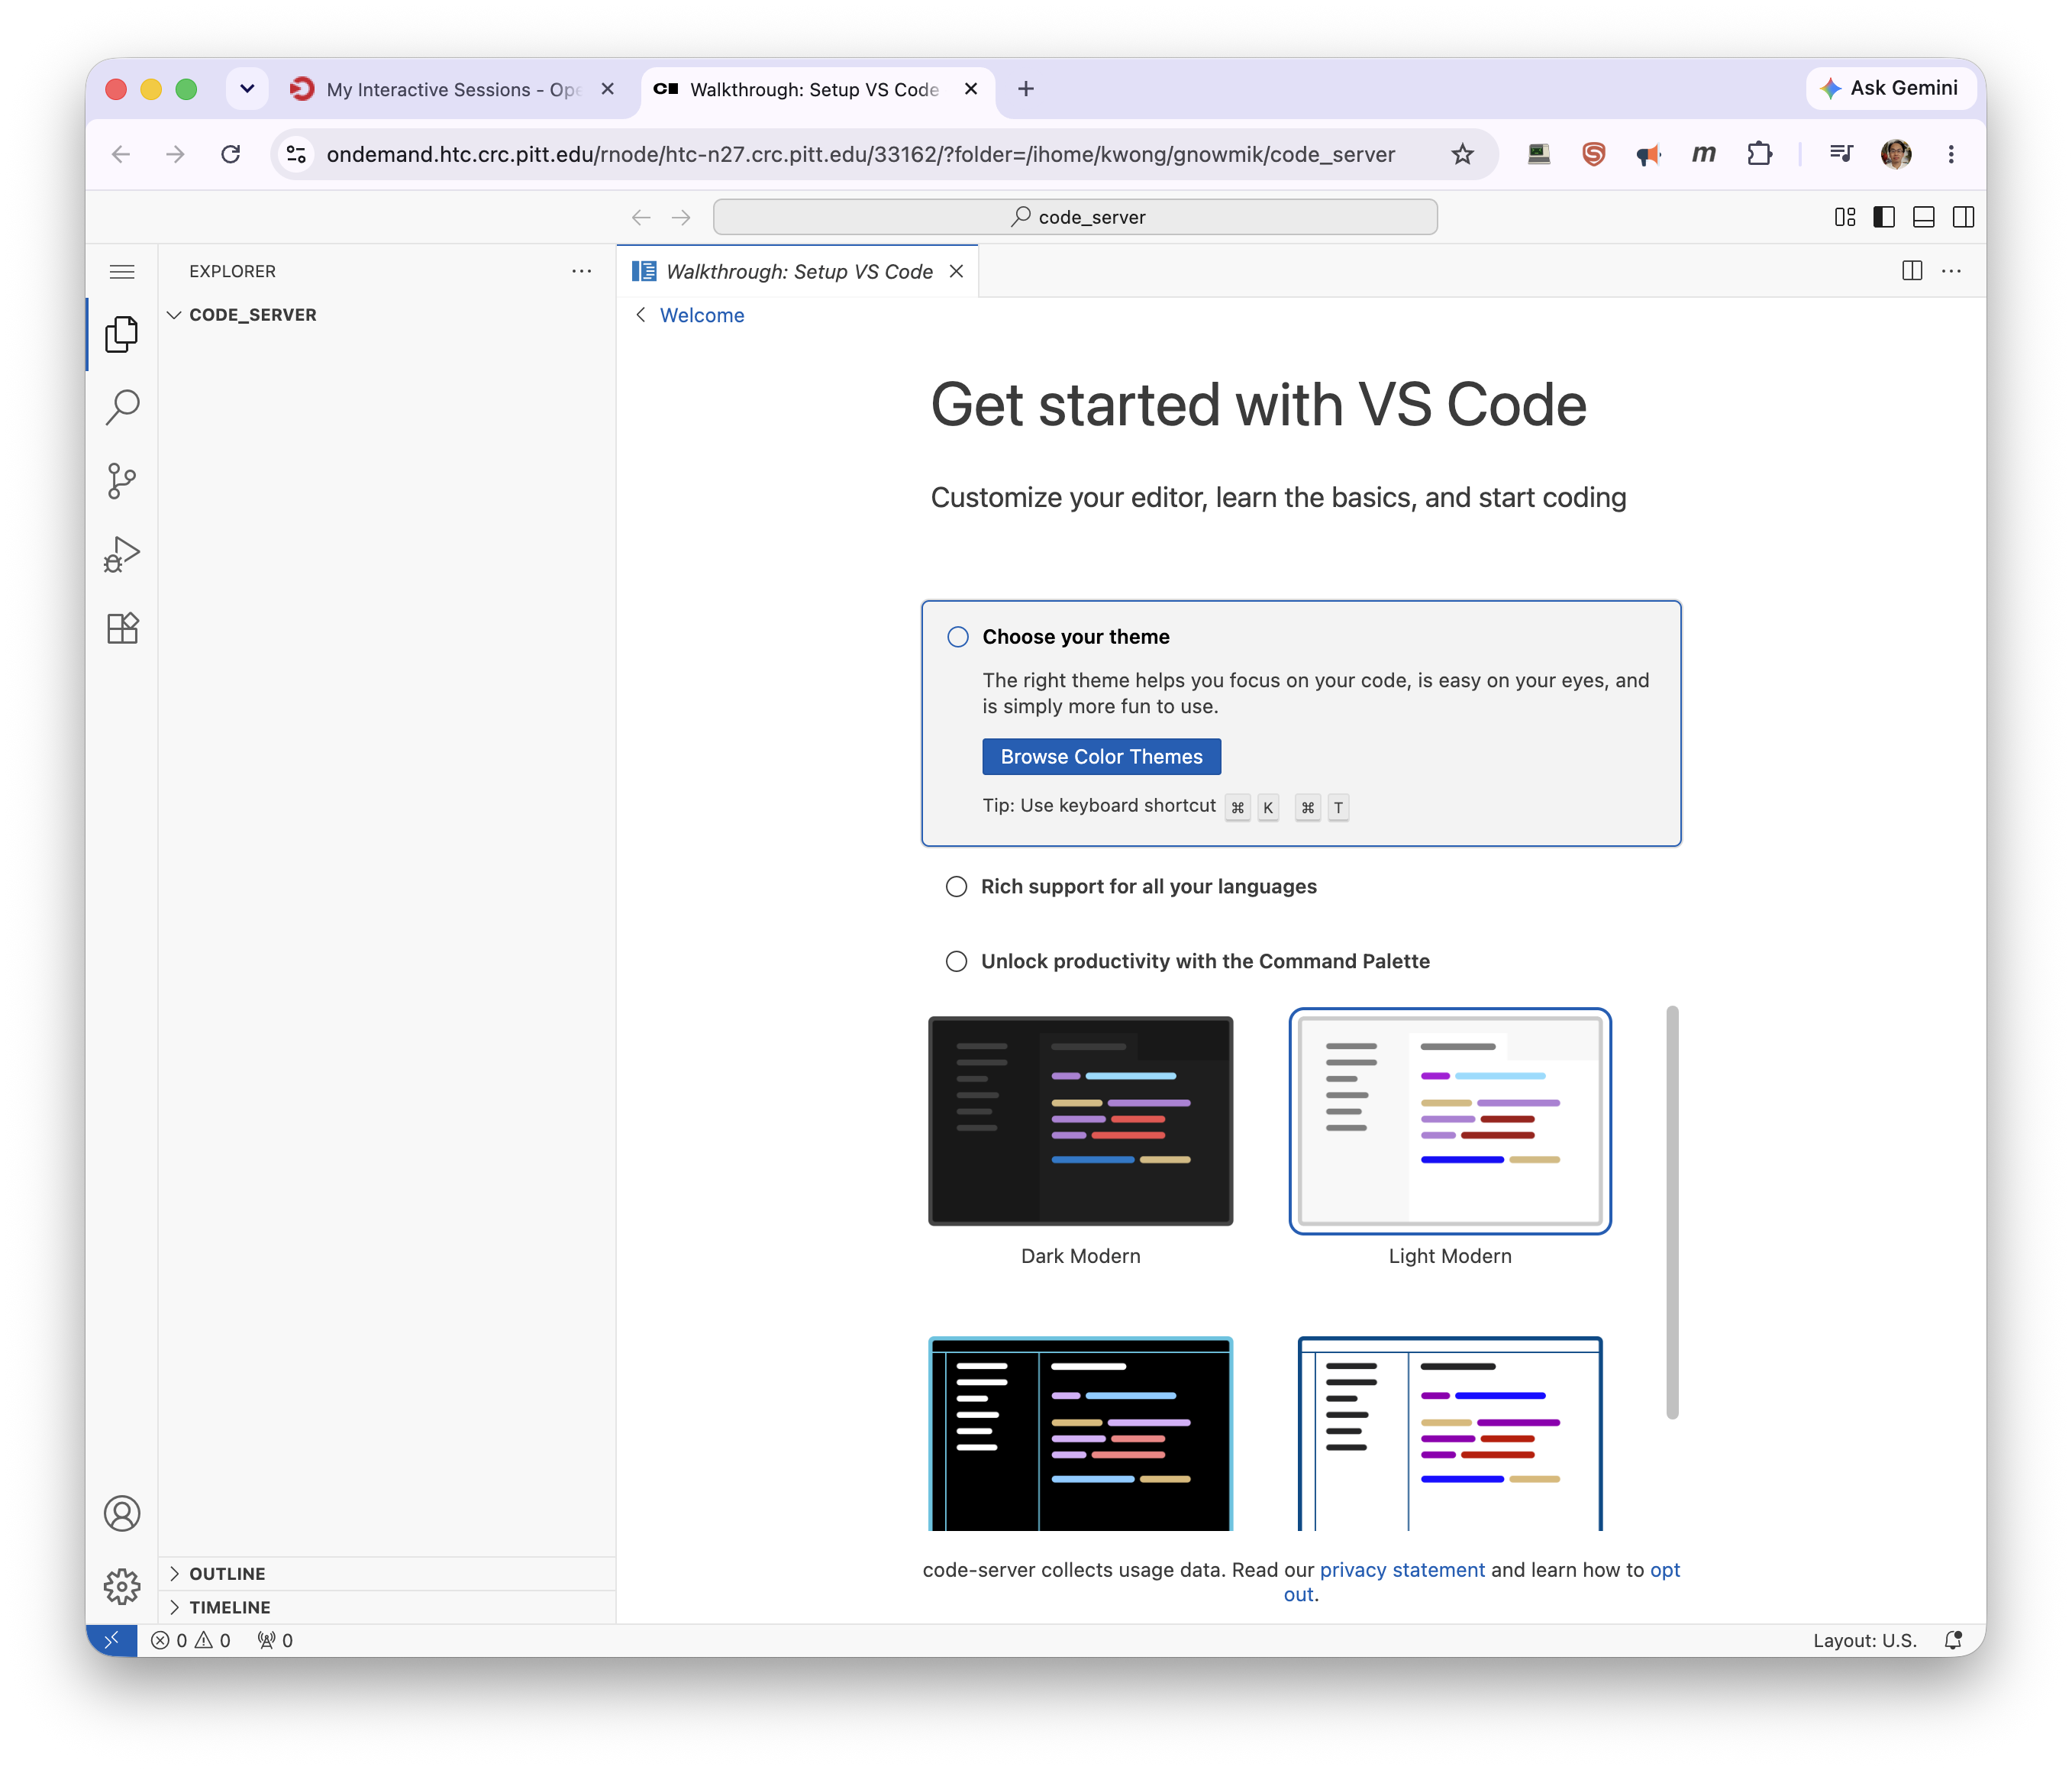
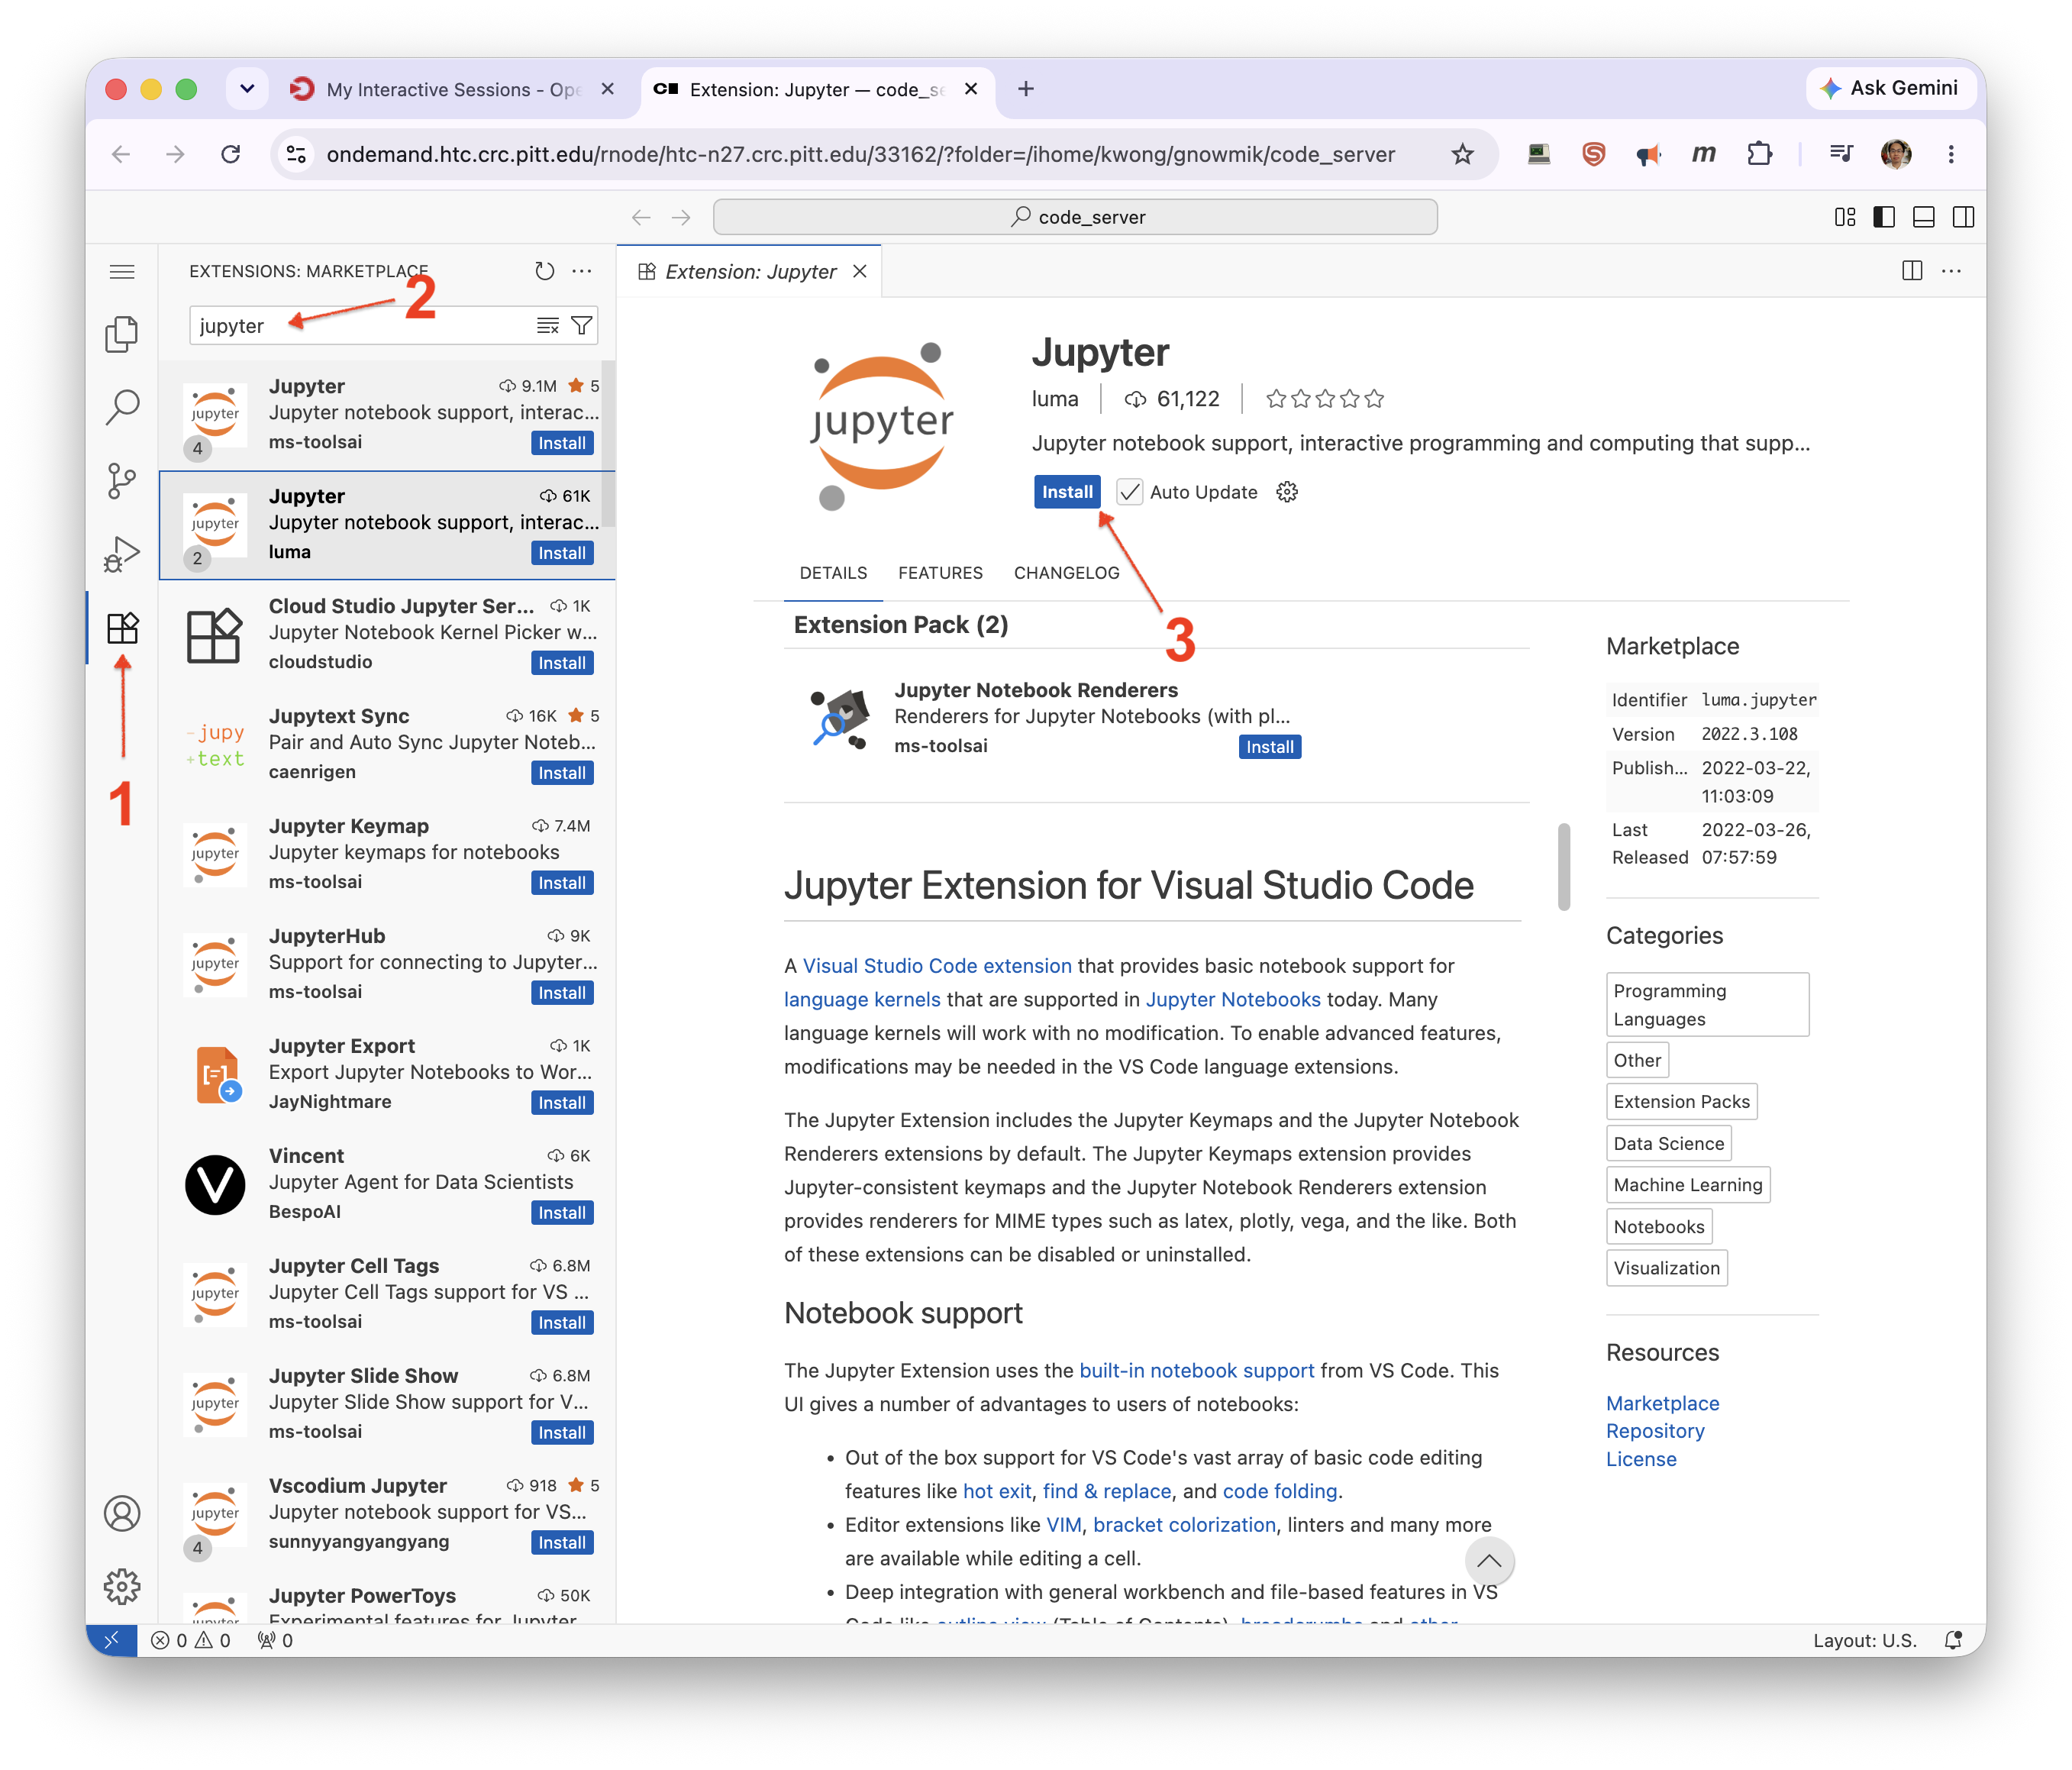
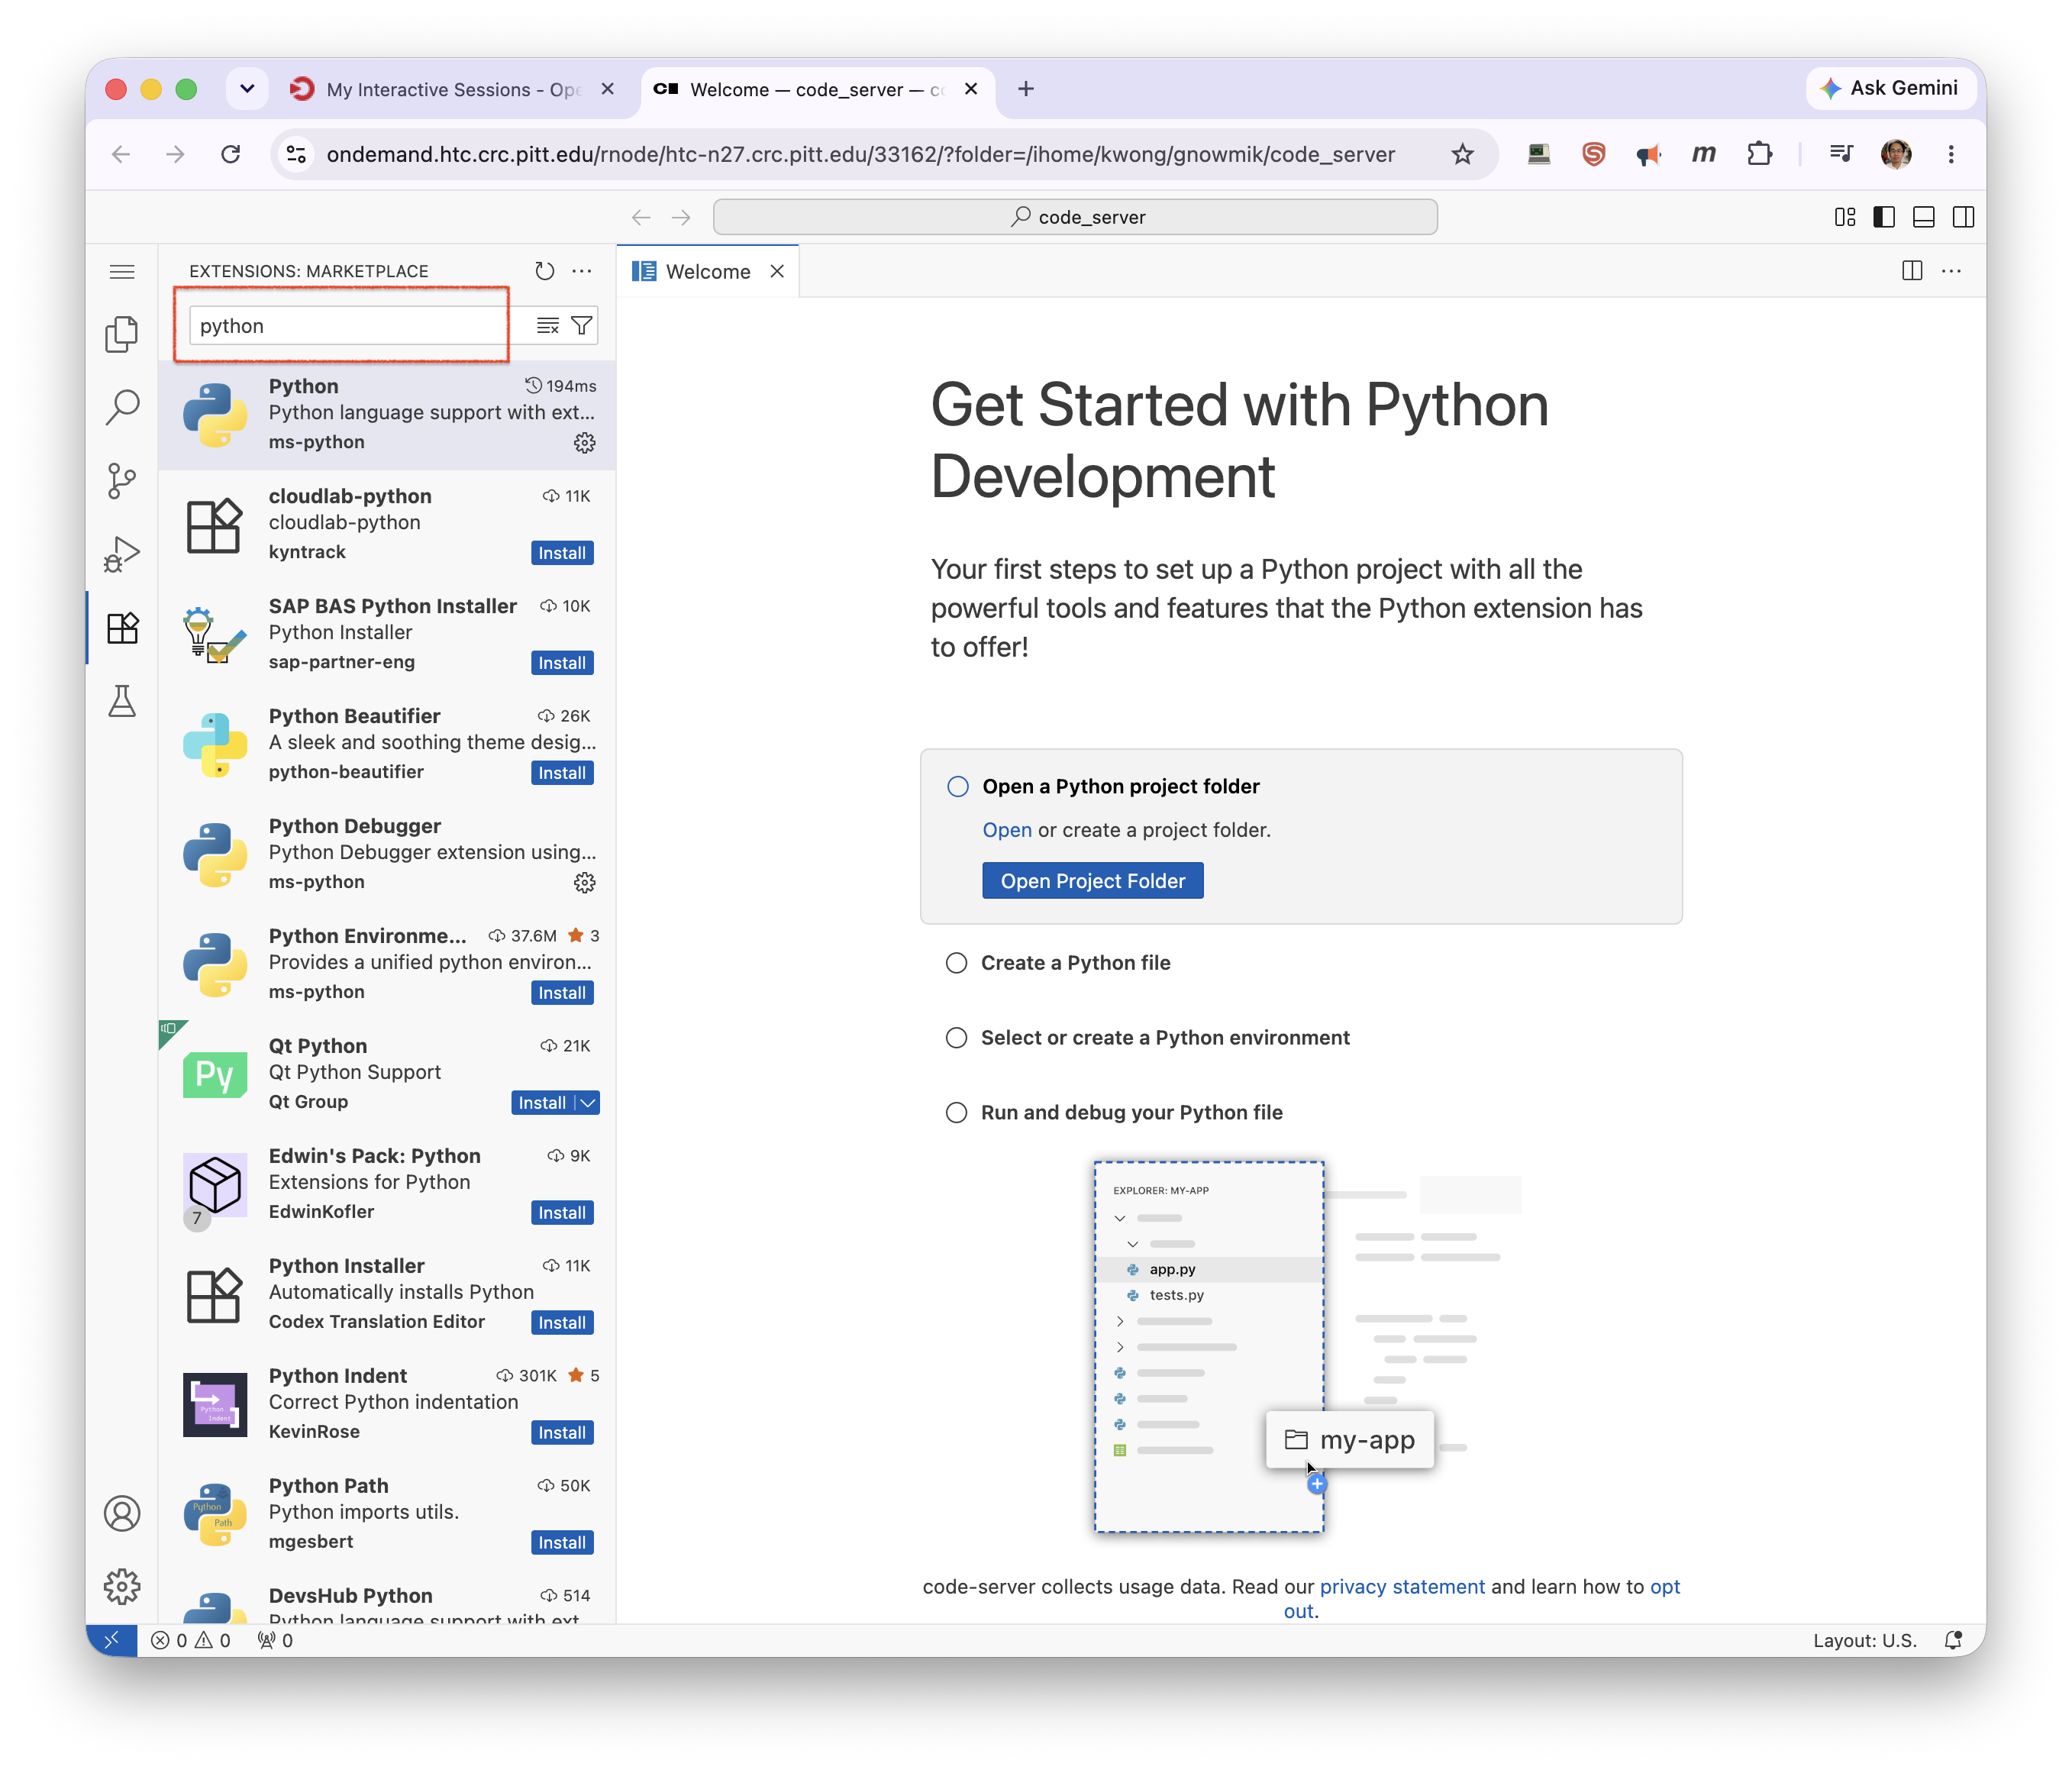
A connection to VS Code will bring up a new browser window displaying the familiar VS Code interface (Step 5), where from the Extensions Marketplace you can install Jupyter (Step 6) or Python (Step7) or any other available extensions discovered through the search box.
Extensions are stored under ~/.local/share/code-server.
Remote tunnel
This approach connects the VS Code installed on your local computer to a CRCD compute node using the Remote-SSH extension.
This is the advanced option
It requires passwordless SSH key setup and an SSH config. If you just want to access VS Code quickly, use the Code Server approach described above.
Prerequisites
- The latest VS Code on your local computer.
- The Remote Development Extension Pack.
One-time setup
1. Set up passwordless SSH. The remote tunnel requires the public key from your local
computer to be installed on the CRCD login node (added to $HOME/.ssh/authorized_keys) so that
you can connect directly without a password. The public key of the CRCD login node also needs to
be added to $HOME/.ssh/authorized_keys so that you can login to an allocated compute node
without a password. This works because your account on the compute nodes uses the same private key
that was generated on the login node. Both steps are covered
in Passwordless SSH.
2. Add an SSH config. On your local computer, add to $HOME/.ssh/config the following settings
(replace <username> with your Pitt username):
Host htc
  HostName htc.crc.pitt.edu
  User <username>
  ControlMaster auto
  ControlPath ~/.ssh/master-%r@%h:%p

Host htcx
  ProxyCommand ssh htc 'nc $(squeue --me --name=tunnel --states=R -h -O NodeList,Comment)'
  StrictHostKeyChecking no
  User <username>

Host gpux
  ProxyCommand ssh htc 'nc $(squeue -M gpu --me --name=tunnel --states=R -h -O NodeList,Comment)'
  StrictHostKeyChecking no
  User <username>
For Windows OS
If ControlMaster isn't available on your machine, omit the ControlMaster
and ControlPath lines from the Host htc block; the rest is unchanged.
3. Create the tunnel Slurm job script. On the CRCD login node, create a file with the following content, depending on if you need a CPU or a GPU node:
#!/bin/bash
#SBATCH --output="tunnel.log"
#SBATCH --job-name="tunnel"
#SBATCH --time=4:00:00
#SBATCH --cpus-per-task=2
#SBATCH --mem-per-cpu=8G

module load python   # any Python module works; used only to find a free port

# find an open port and record it in the job's Comment field
PORT=$(python -c 'import socket; s=socket.socket(); s.bind(("", 0)); print(s.getsockname()[1]); s.close()')
scontrol update JobId="$SLURM_JOB_ID" Comment="$PORT"

# start an sshd on that port, using your key as the host key
echo "Starting sshd on port $PORT"
/usr/sbin/sshd -D -p ${PORT} -f /dev/null -h ${HOME}/.ssh/id_ed25519
#!/bin/bash
#SBATCH --output="tunnel.log"
#SBATCH --job-name="tunnel"
#SBATCH --time=6:00:00
#SBATCH --cluster=gpu
#SBATCH --partition=l40s     # a100 | l40s | h200 | rtx6k
#SBATCH --gres=gpu:1
#SBATCH --cpus-per-task=2
#SBATCH --mem-per-cpu=8G

module load python   # any Python module works; used only to find a free port

# find an open port and record it in the job's Comment field
PORT=$(python -c 'import socket; s=socket.socket(); s.bind(("", 0)); print(s.getsockname()[1]); s.close()')
scontrol update JobId="$SLURM_JOB_ID" Comment="$PORT"

# start an sshd on that port, using your key as the host key
echo "Starting sshd on port $PORT"
/usr/sbin/sshd -D -p ${PORT} -f /dev/null -h ${HOME}/.ssh/id_ed25519
Establishing Tunnel
These steps below are necessary for each coding session. From your local terminal, connect to the htc cluster
ssh -X gnowmik@htc.crc.pitt.edu
and submit the tunnel job to Slurm:
[gnowmik@login3 vscode_tunnel]$ sbatch tunnel_CPU.slurm
sbatch: You have specified NO/WRONG partition, so defaulting to the htc partition.
Submitted batch job 10734140
[gnowmik@login3 vscode_tunnel]$ squeue -M htc -u $USER
CLUSTER: htc
             JOBID PARTITION     NAME     USER ST       TIME  NODES NODELIST(REASON)
          10734140       htc   tunnel  gnowmik  R    1:12:58      1 htc-n77
[gnowmik@login3 vscode_tunnel]$
[gnowmik@login3 vscode_tunnel]$ sbatch tunnel_GPU.slurm
Submitted batch job 3416144 on cluster gpu
[gnowmik@login3 vscode_tunnel]$ squeue -M gpu --me
CLUSTER: gpu
             JOBID PARTITION     NAME     USER ST       TIME  NODES NODELIST(REASON)
           3416144      l40s   tunnel  gnowmik  R       0:06      1 gpu-n59
[gnowmik@login3 vscode_tunnel]$
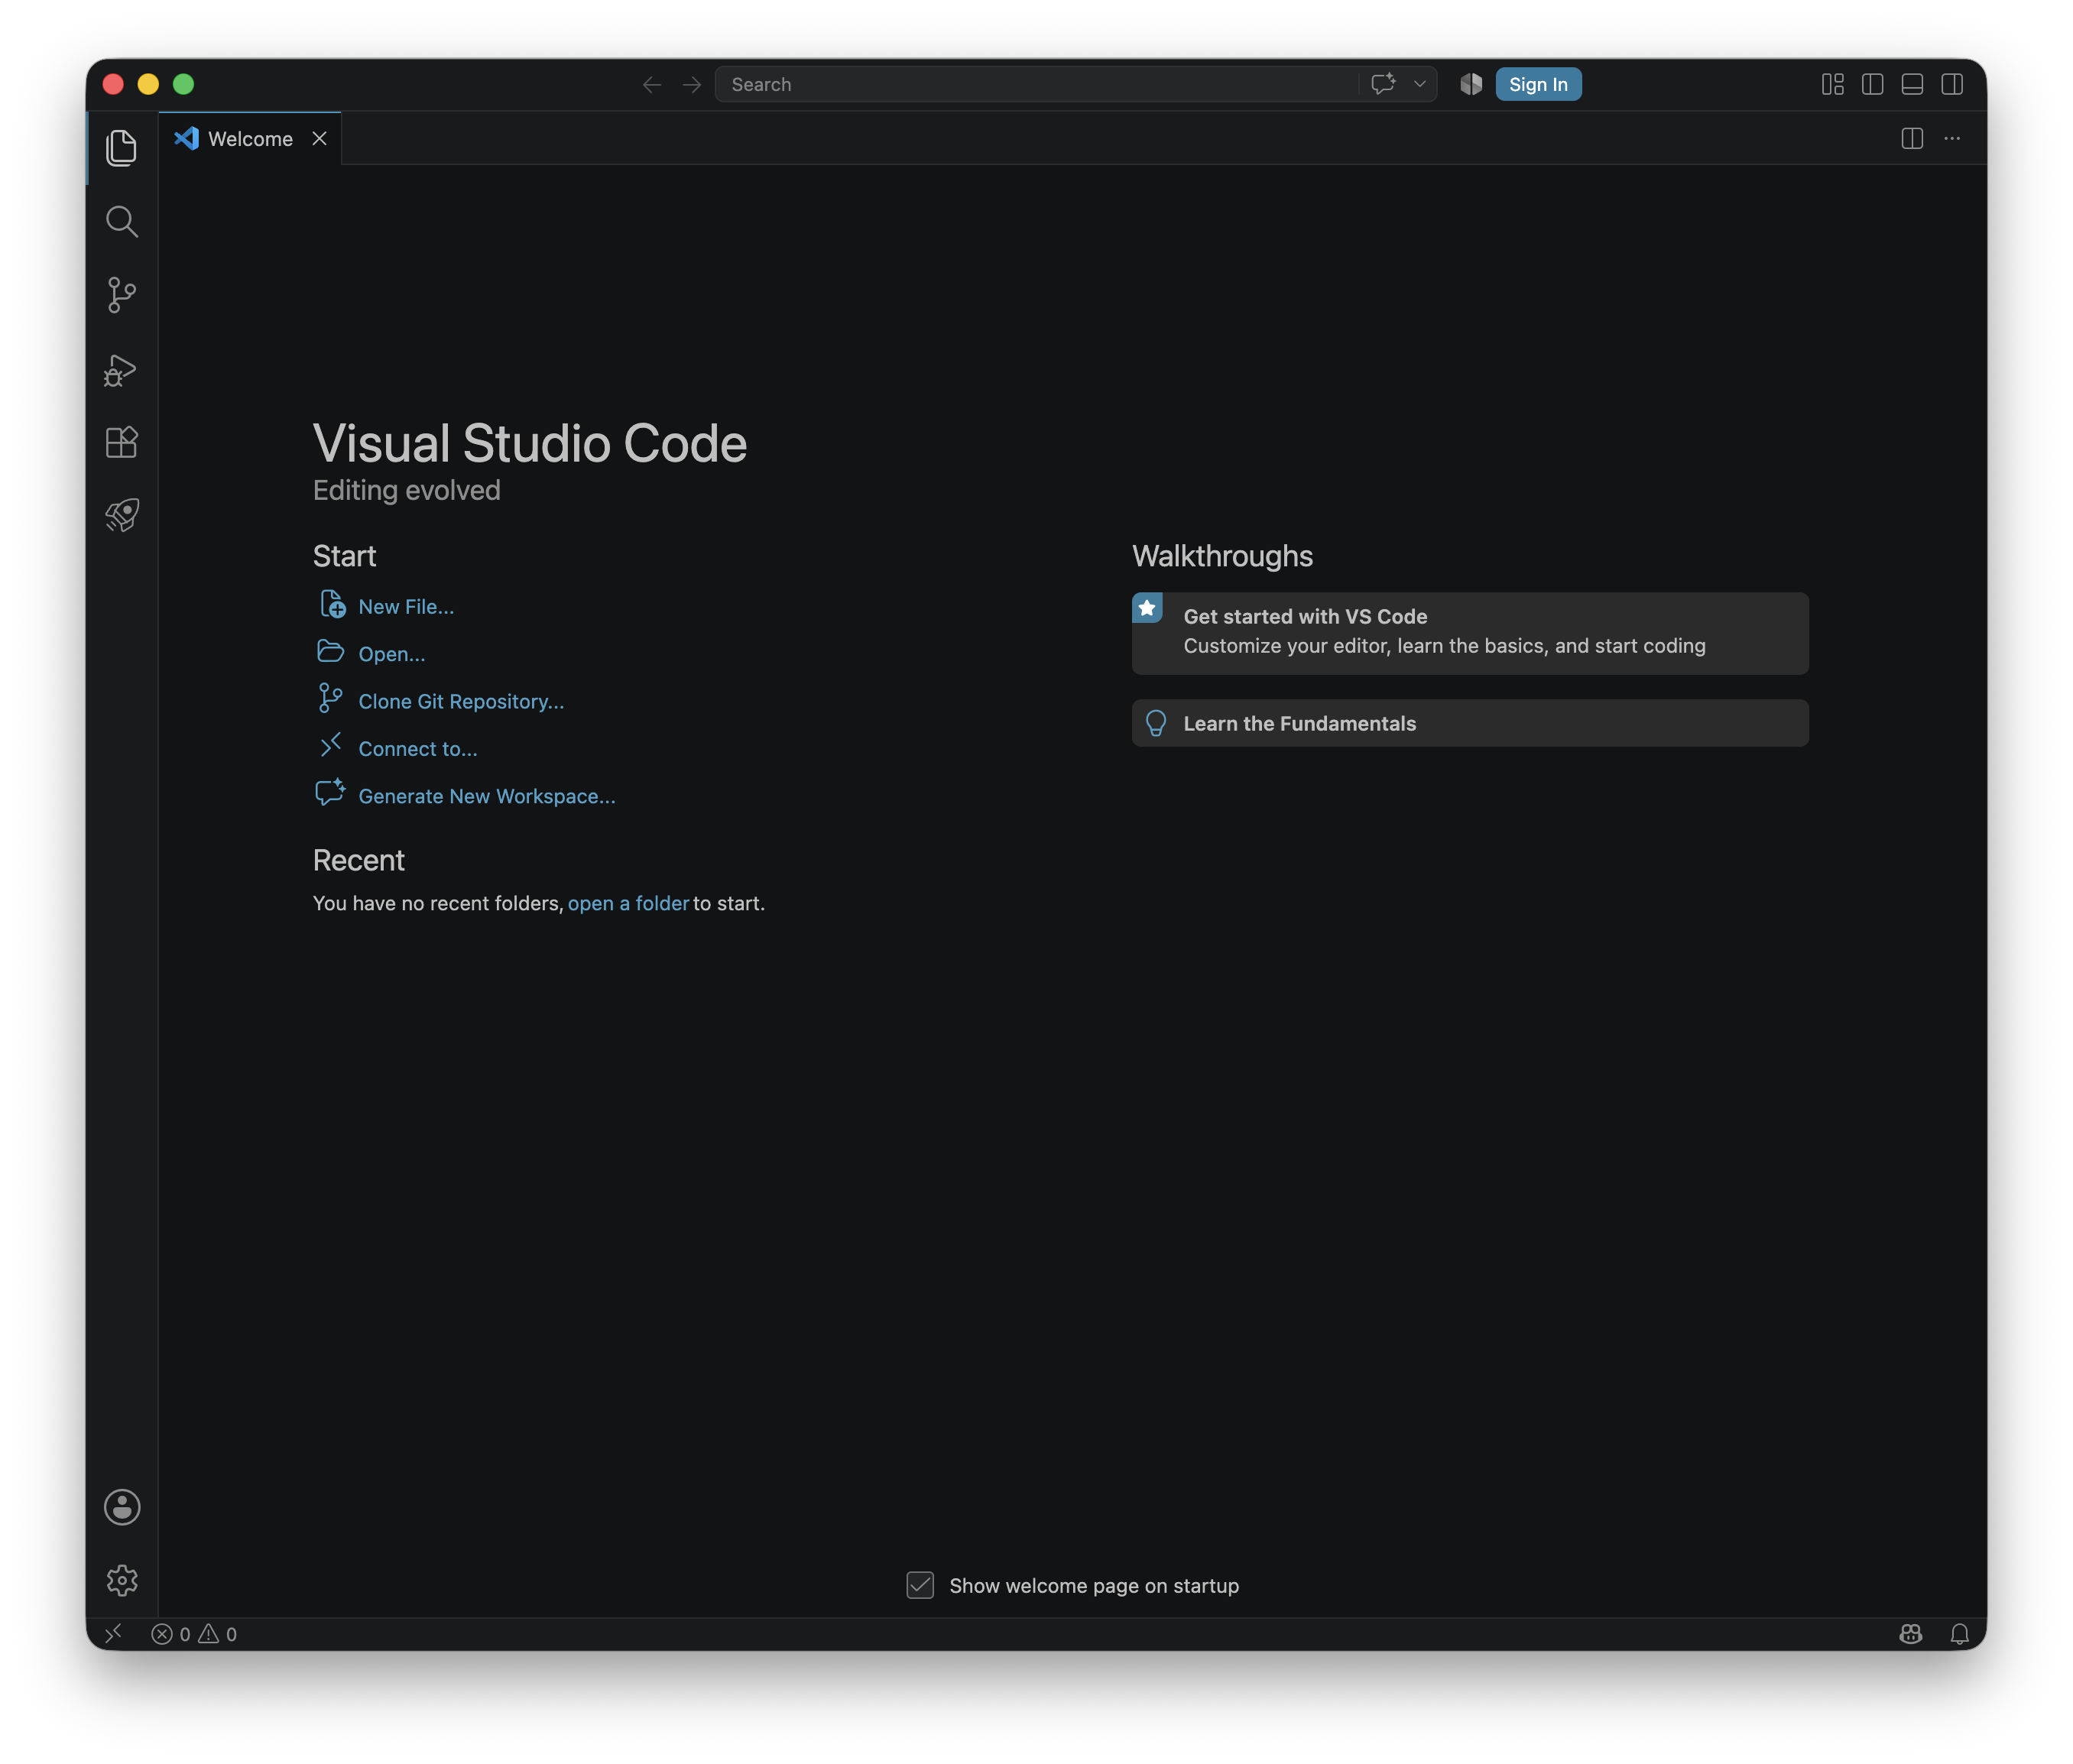
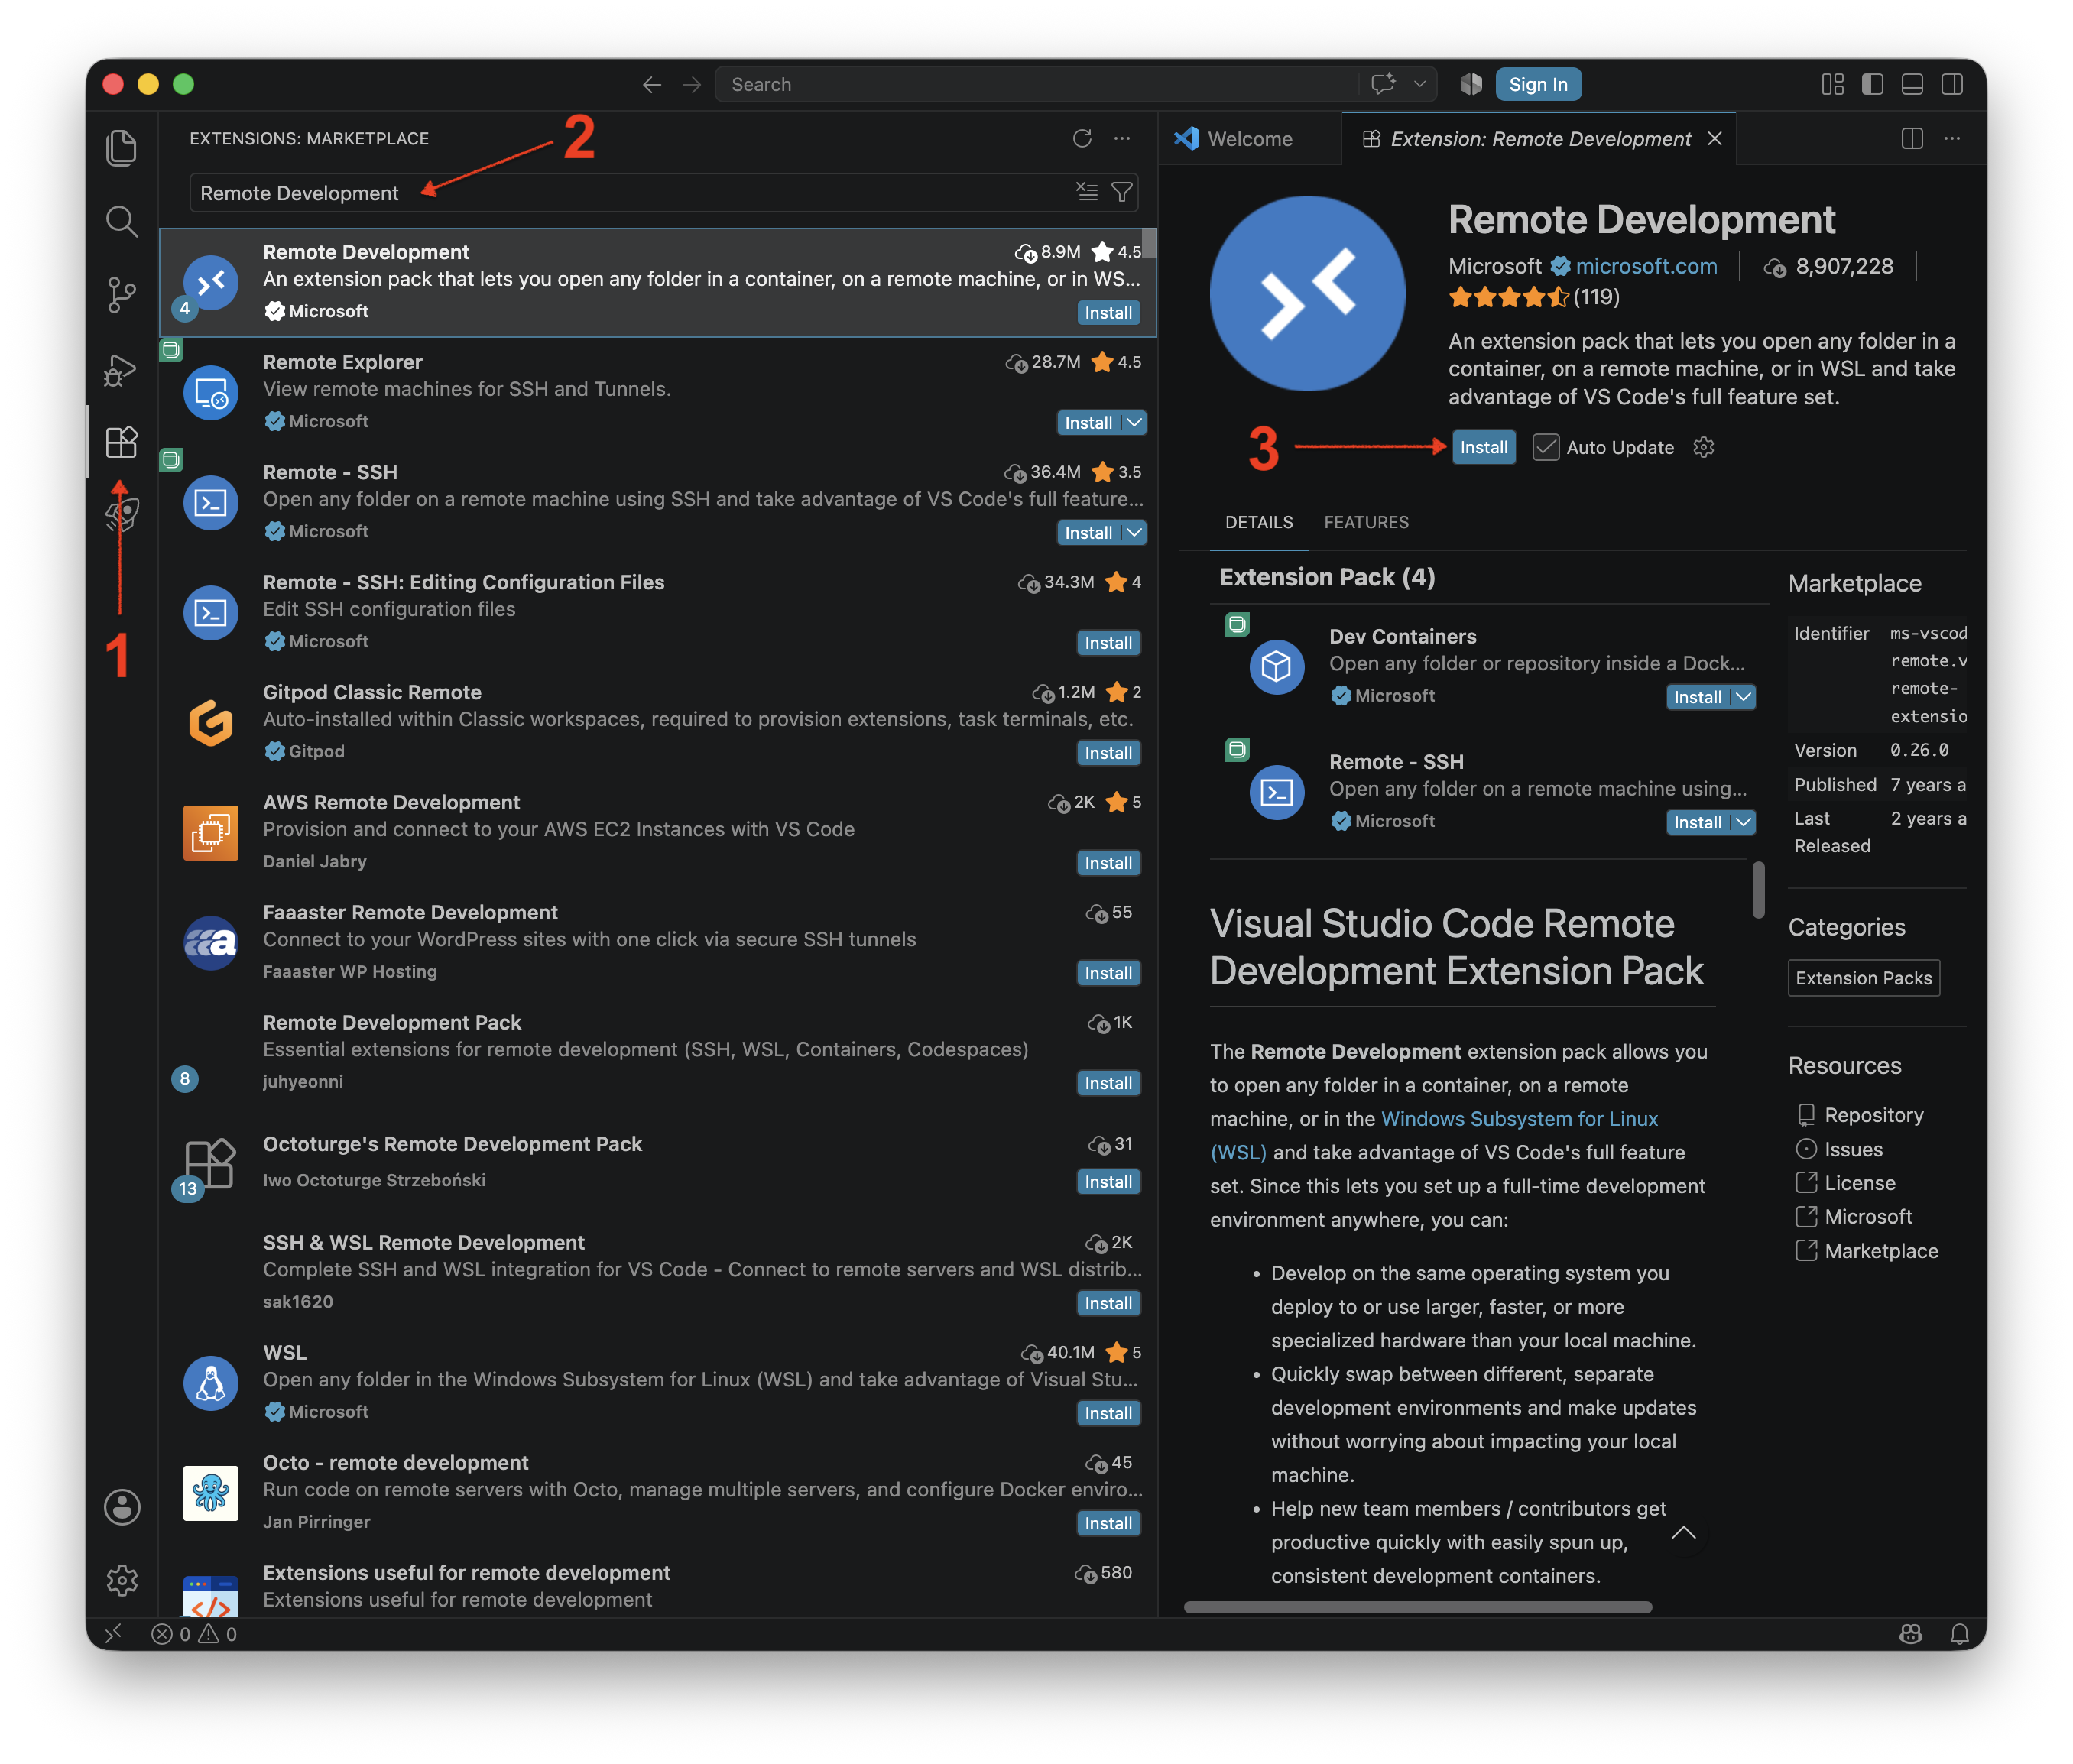
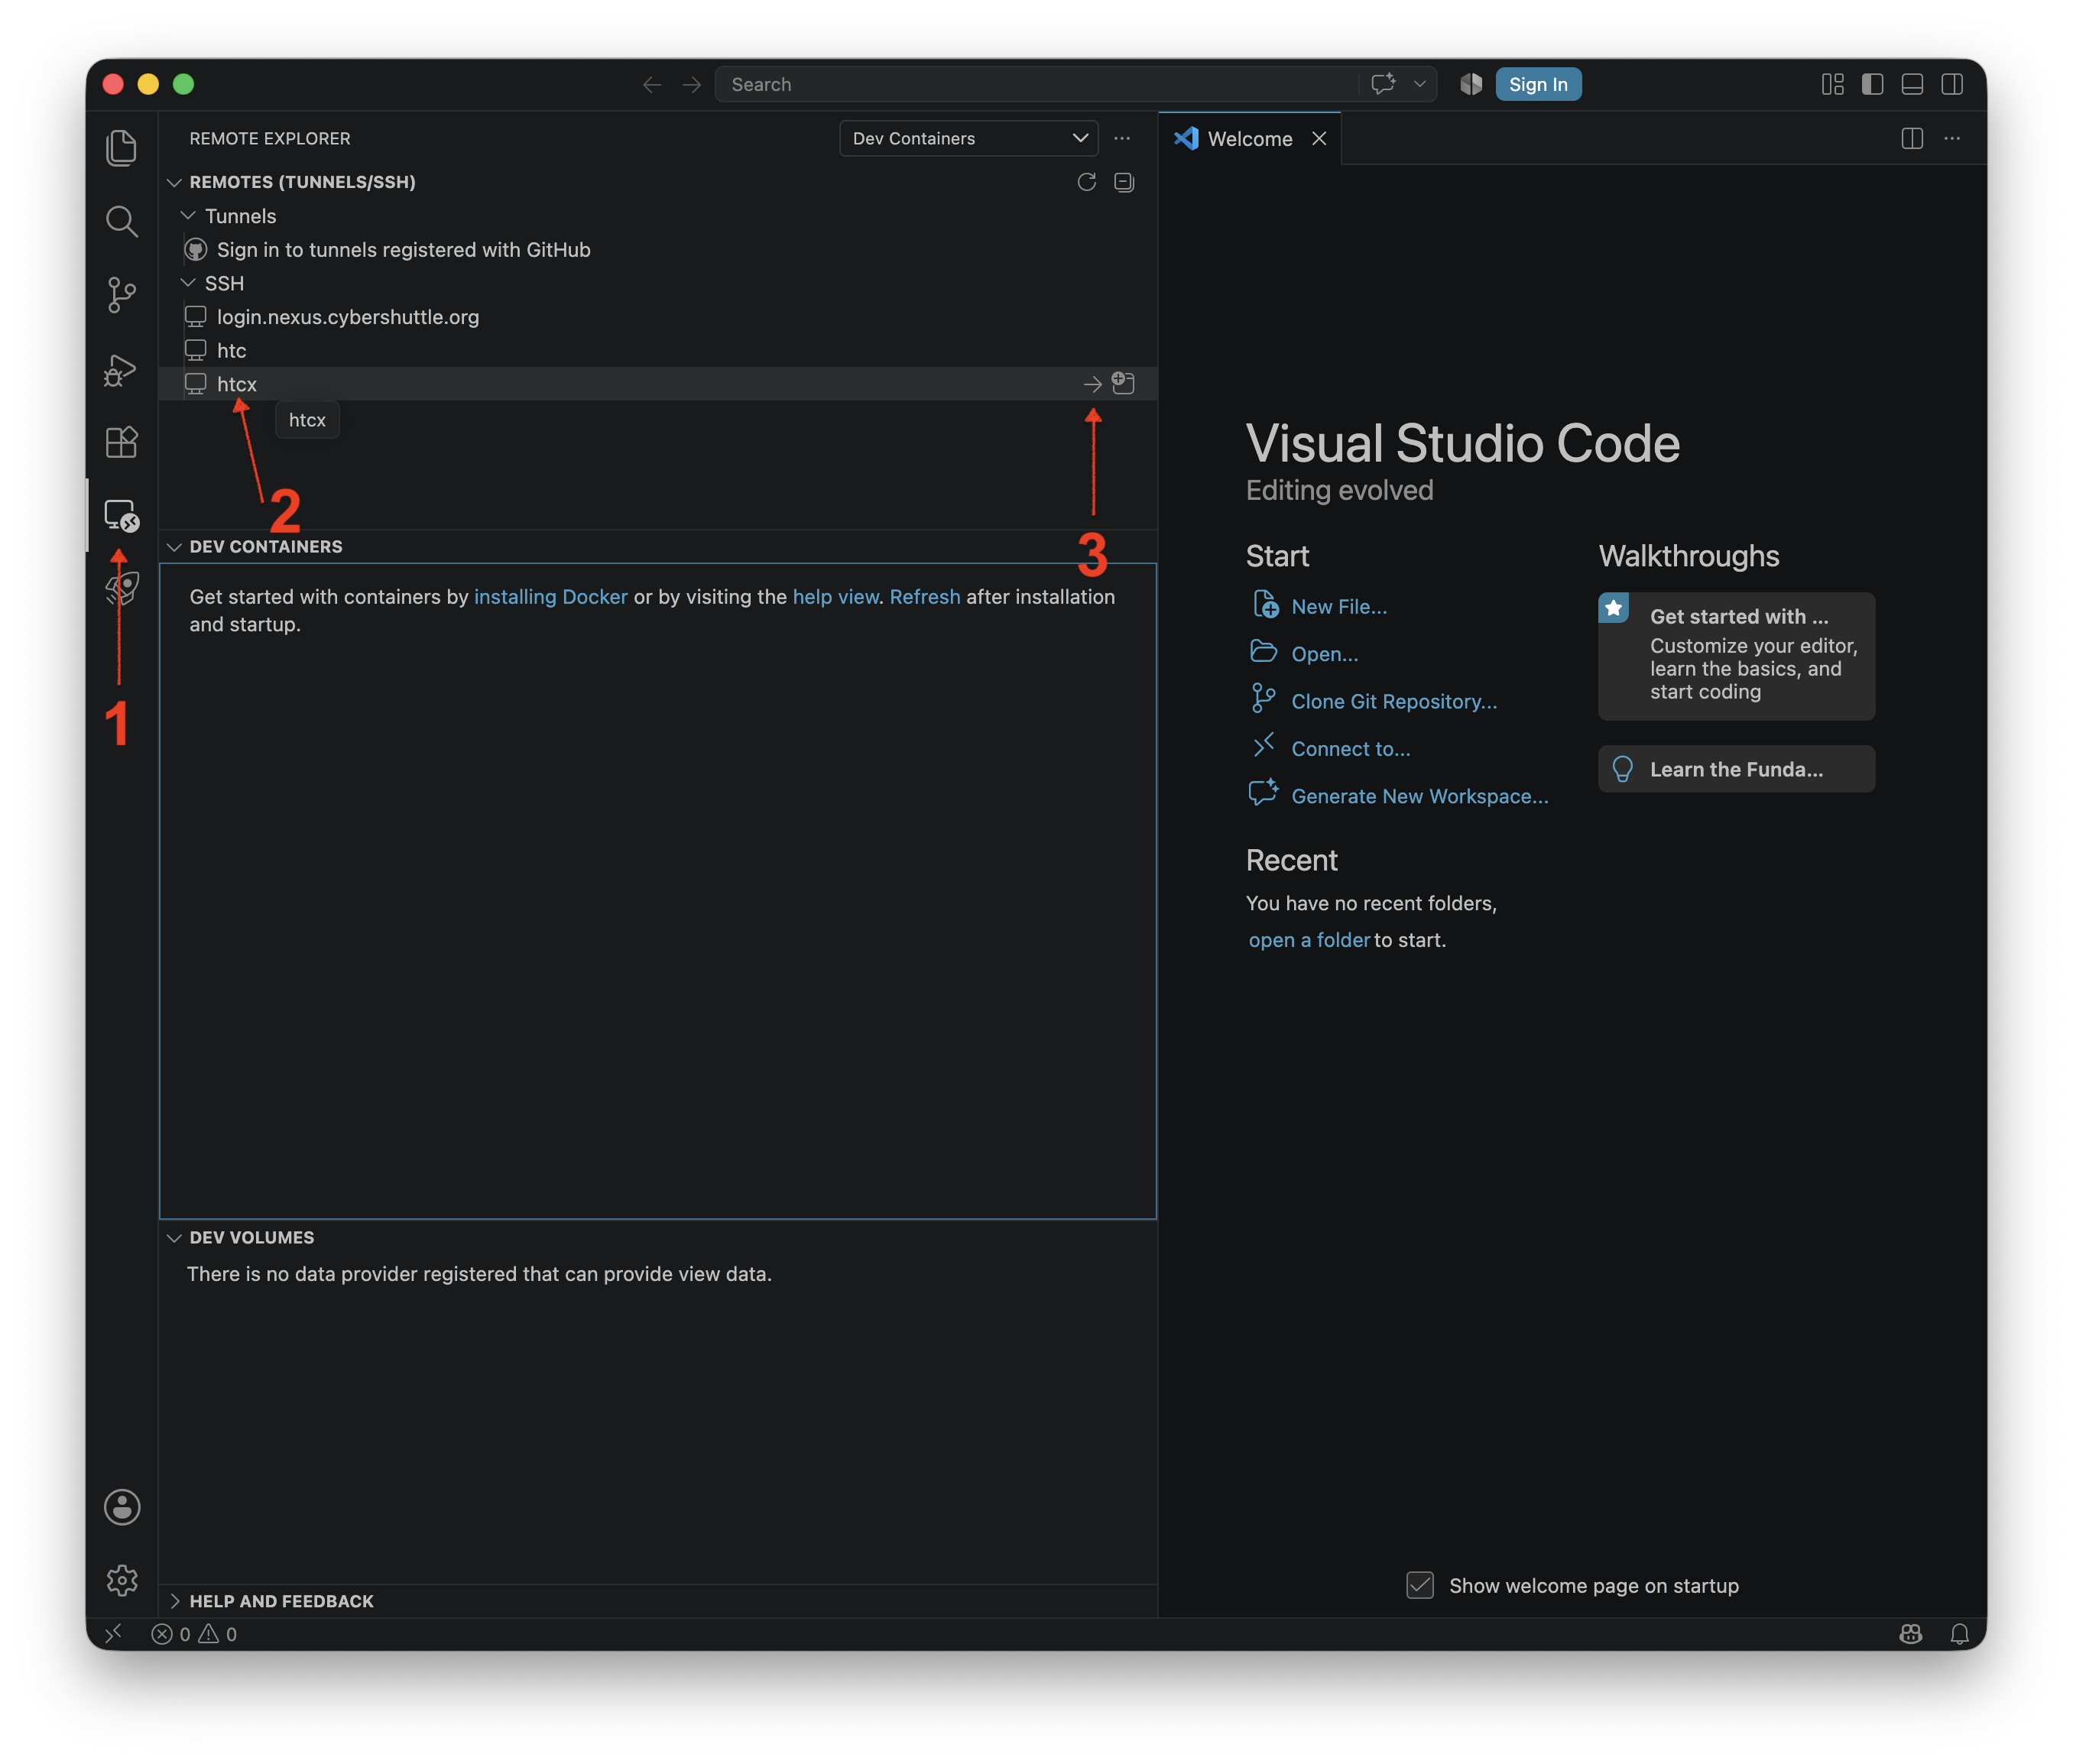
Once the job runs, open VS Code on your local computer (Step 1) and connect via Remote Explorer
using htcx as the SSH target for a CPU node or gpux as the SSH target for a GPU node (Step 3).
If you do not have the Remote Development extension installed,
you will need to do that first (Step 2) before you have access to the Remote Explorer widget. A
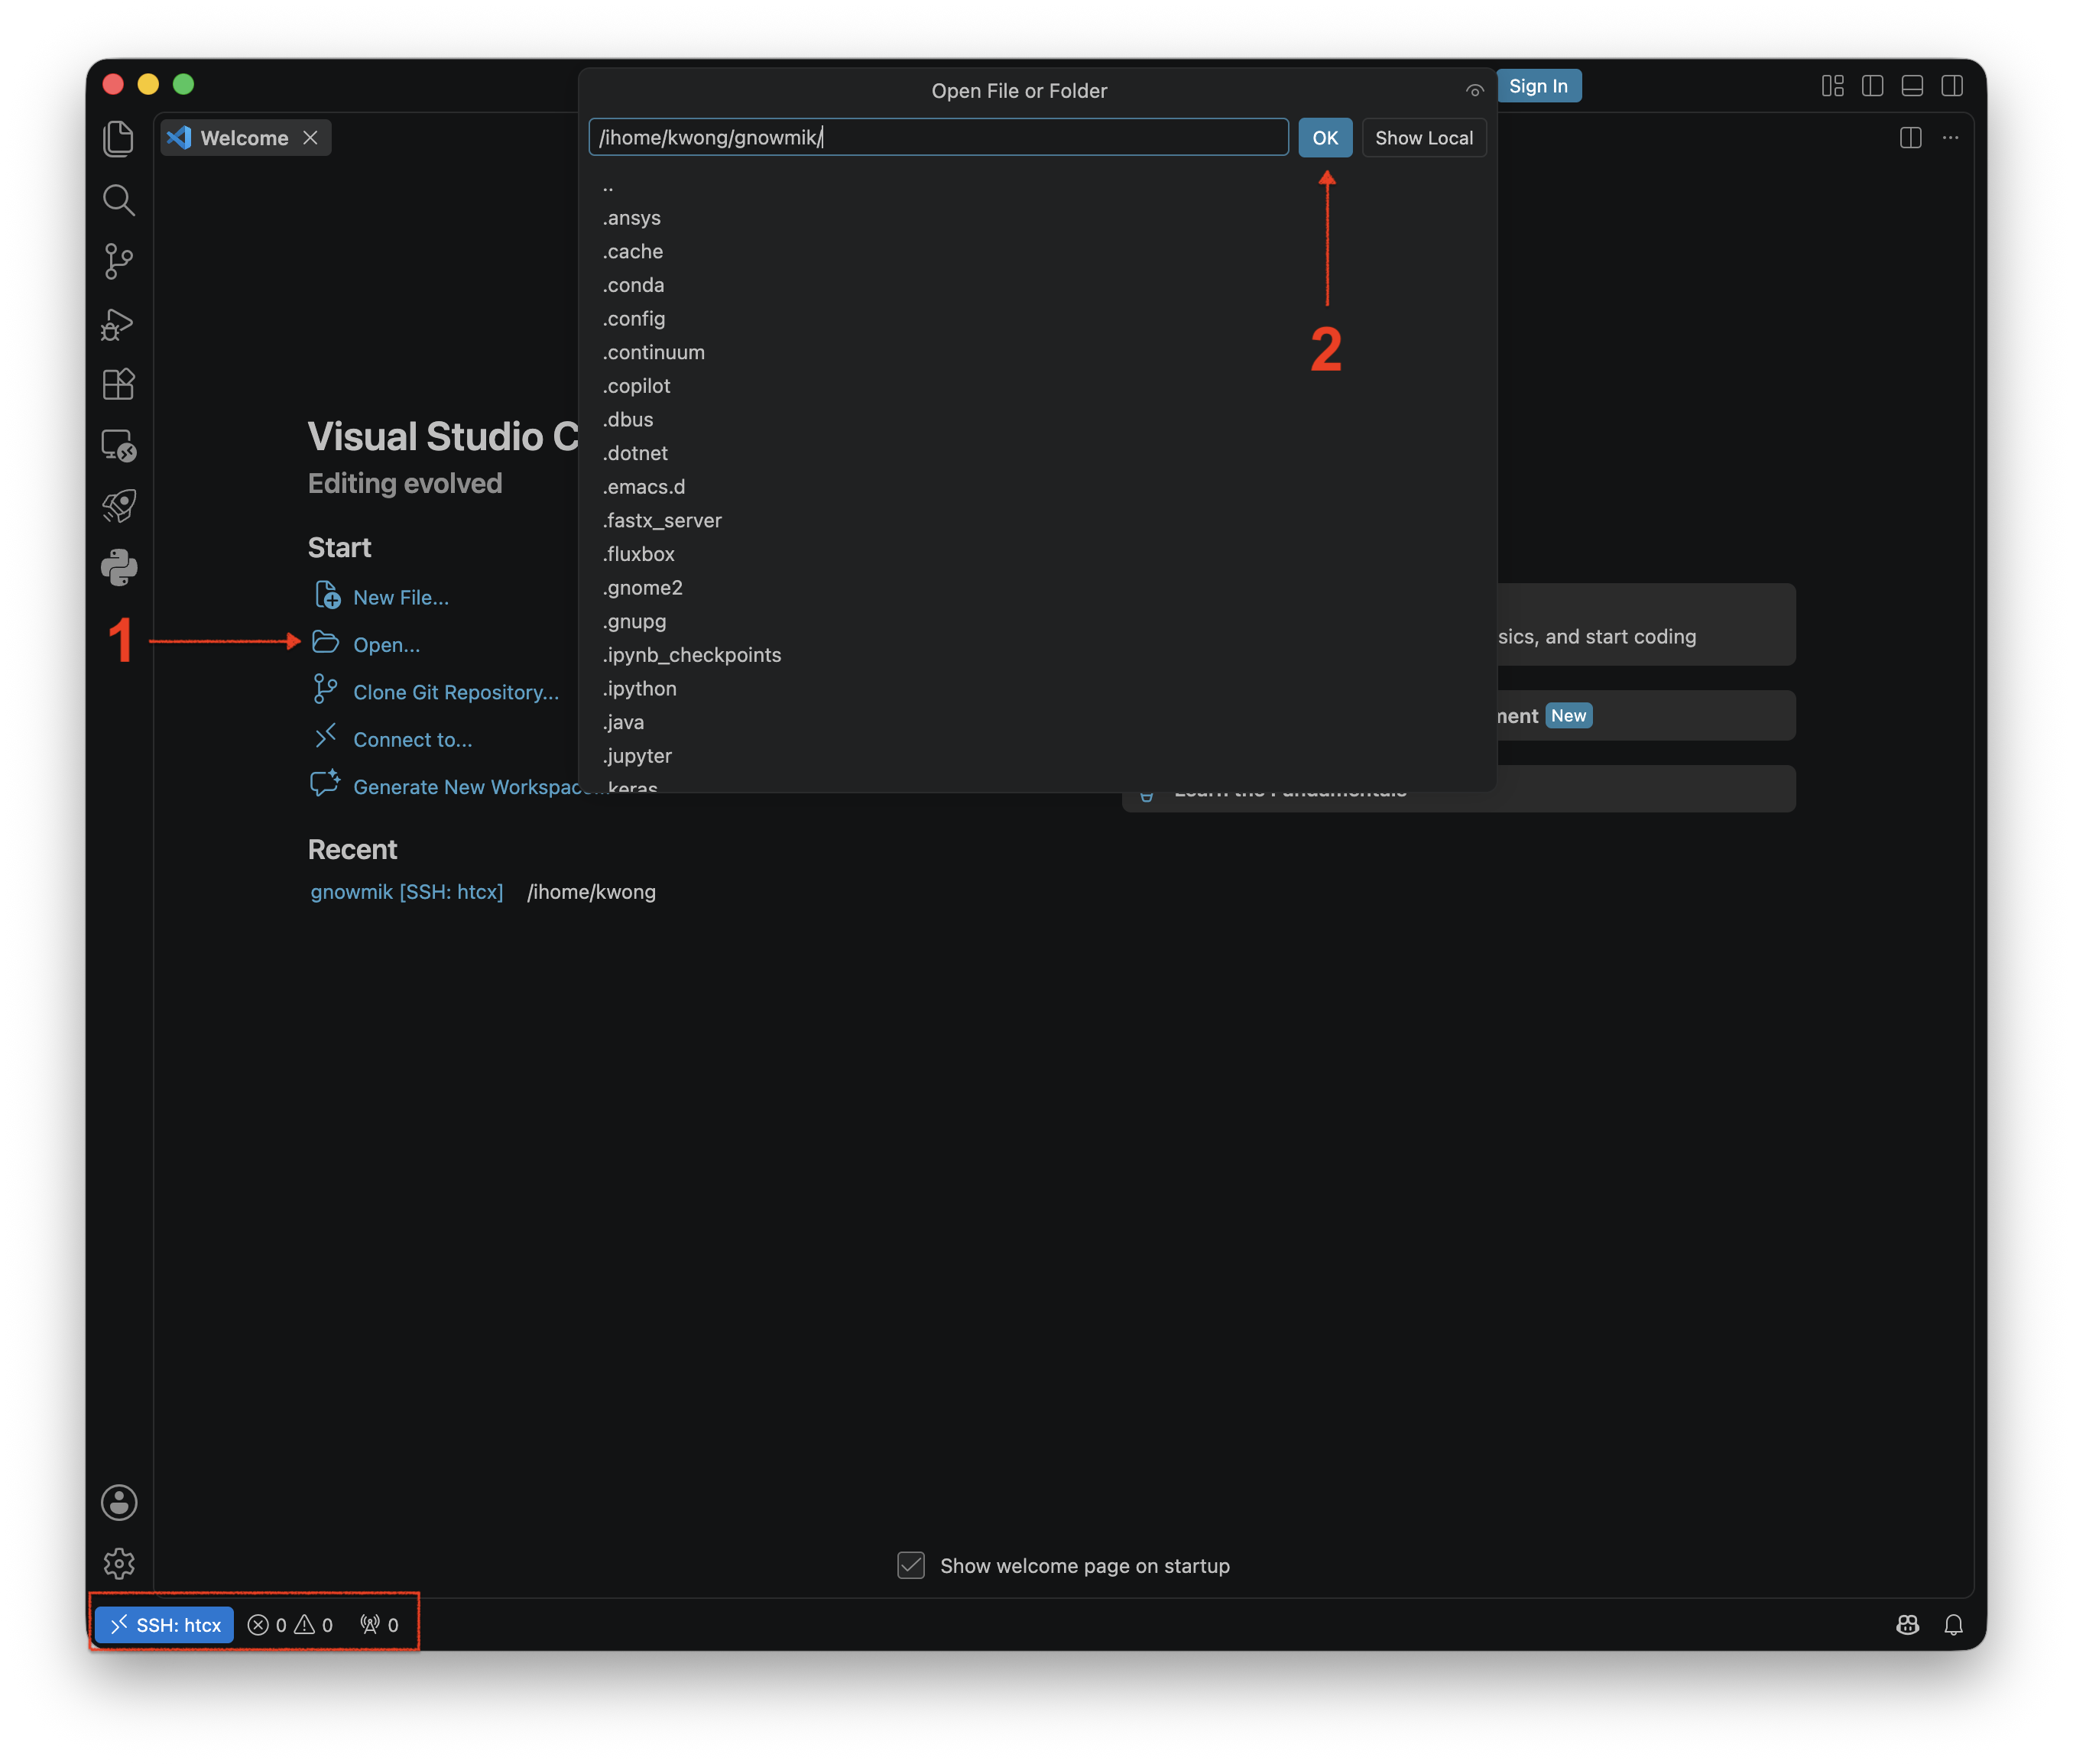
successful connection will show a status with 0 errors or warnings in the lower left corner of the
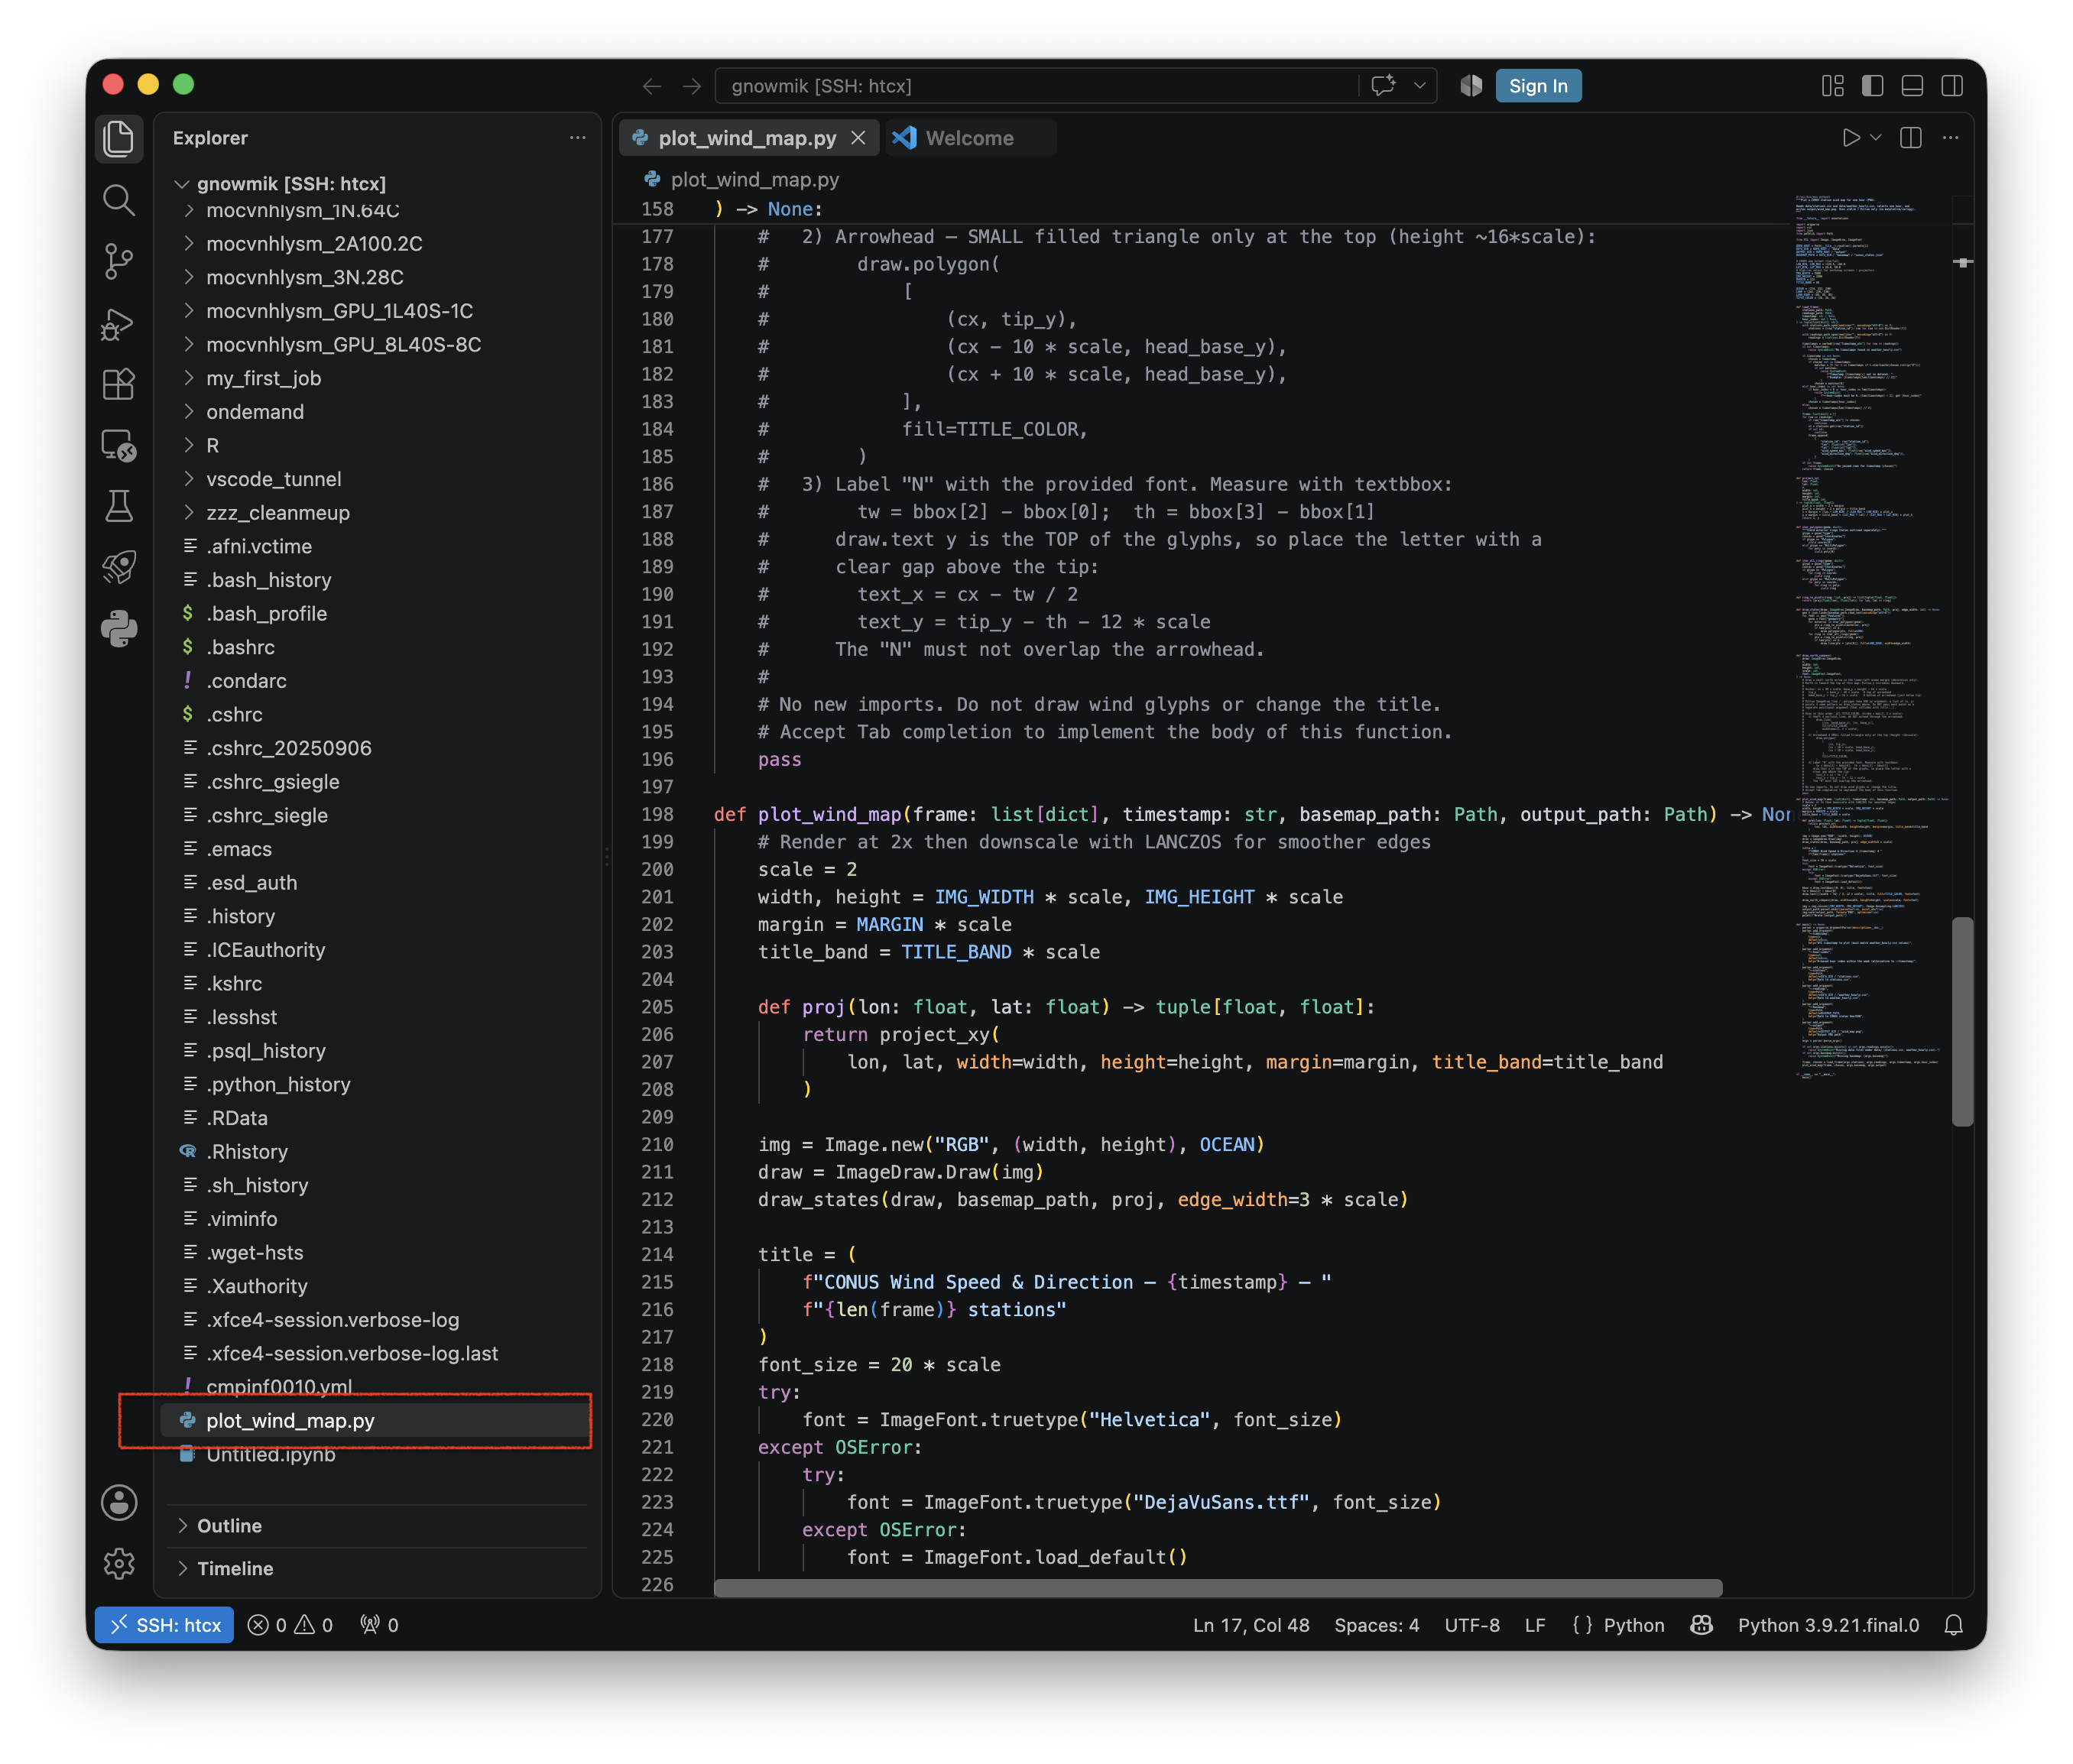
GUI. You can use the navigation widget to display the remote filesystem (Step 4) and open your code
that has the supported extension installed (Step 5).
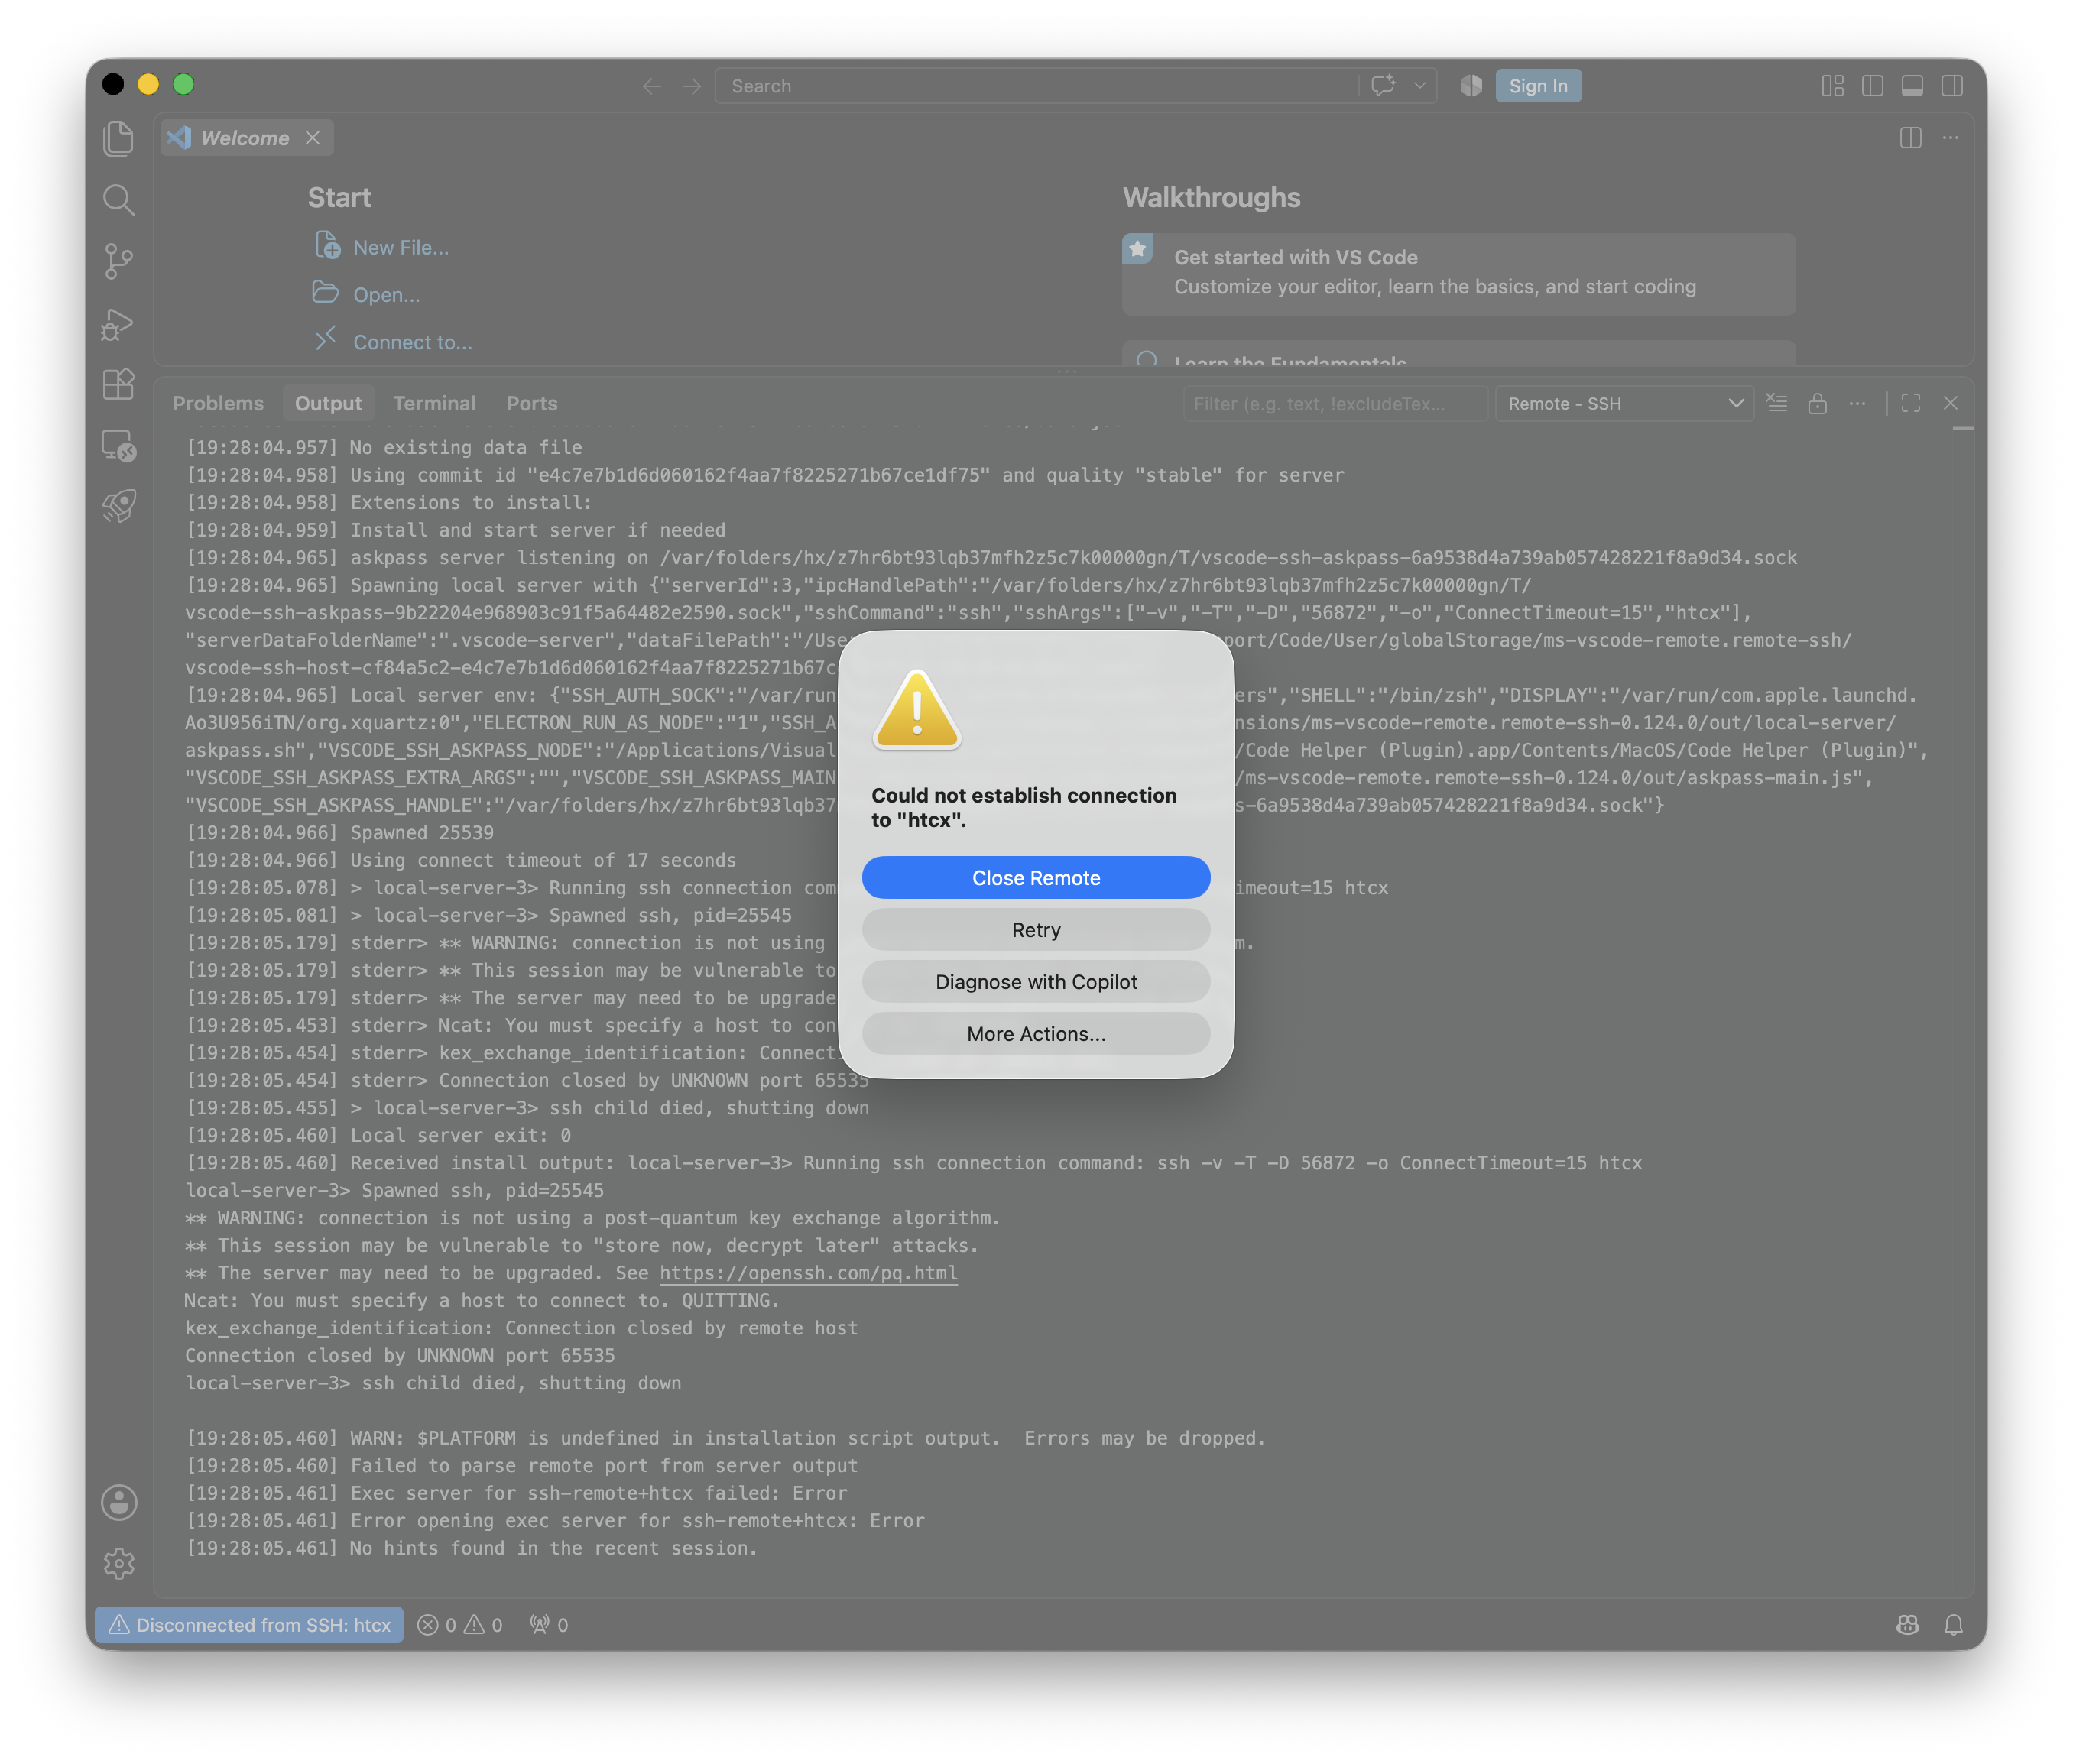
Tunnel failed
If you attempt to establish a tunnel before the Slurm job enters the Running state, you will see the error shown in the Error tab below.
To end your session, click on the connection shown in the lower left corner of the panel and select Close Remote Connection.
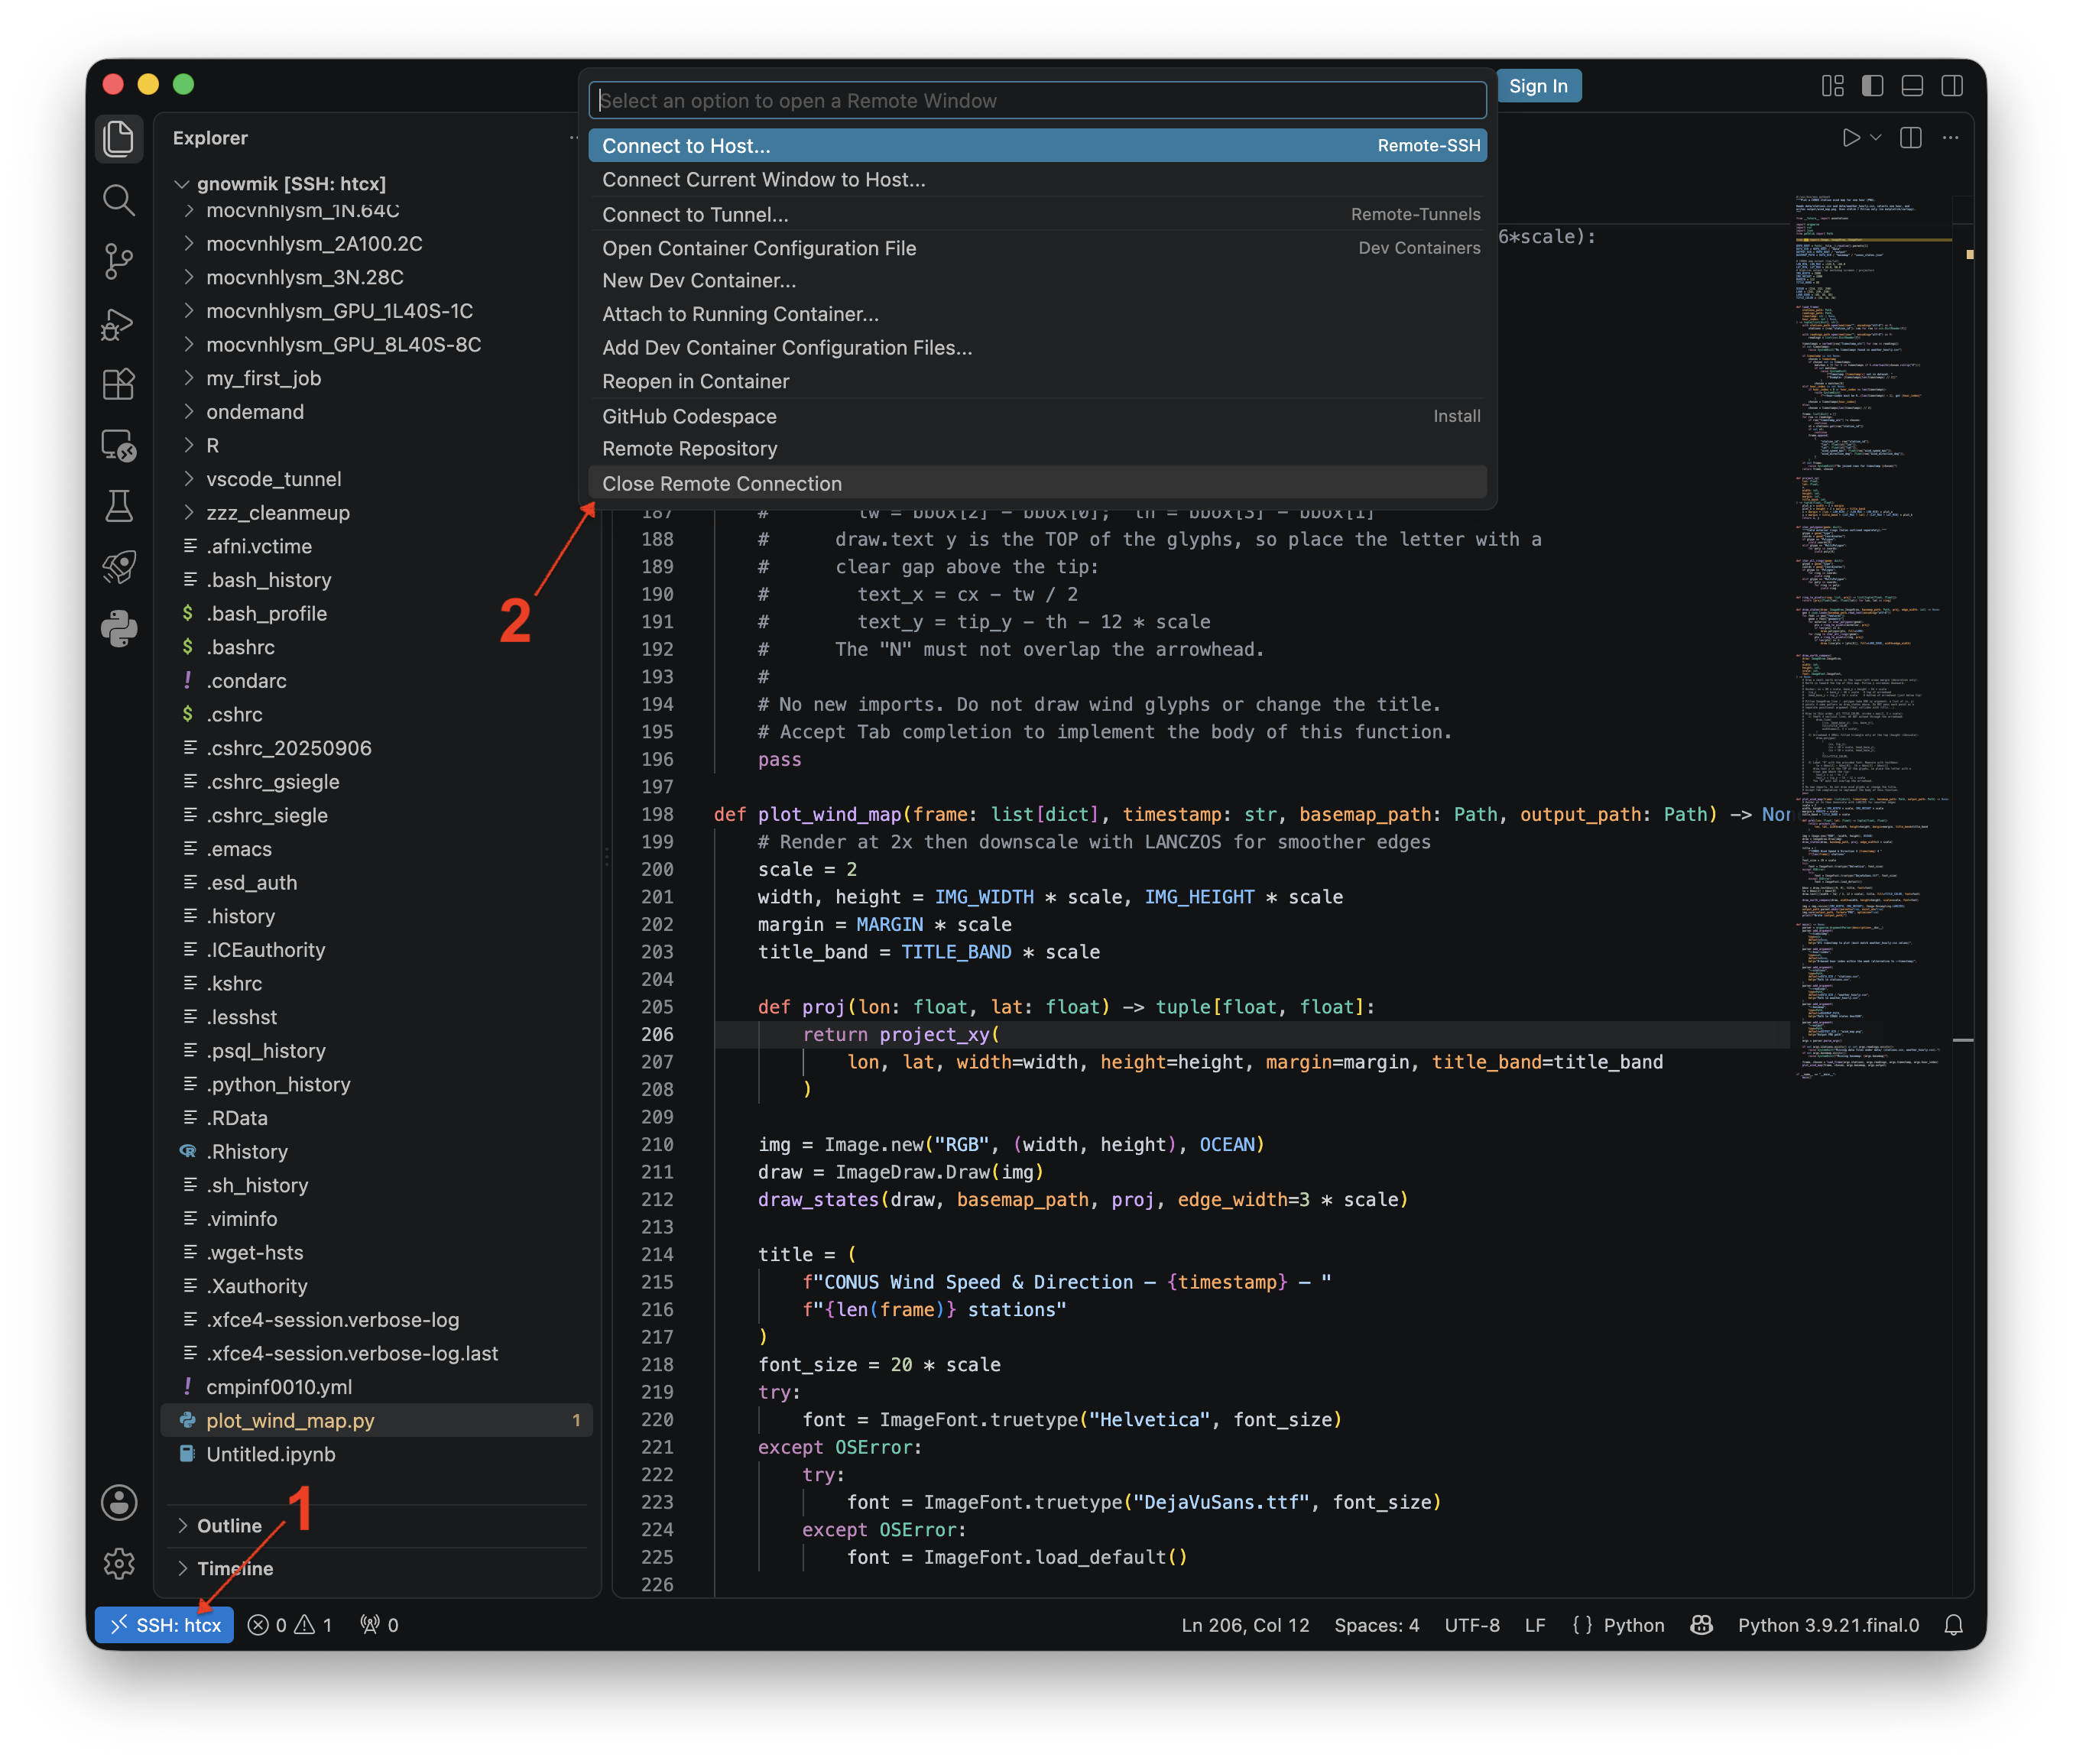
Reminder: Closing the Remote Connection does not end your Slurm job. You need to cancel the job to shutdown everything; otherwise, the job will continue to run and consume Service Units until hitting the walltime.
[gnowmik@login3 vscode_tunnel]$ squeue -M htc -u $USER
CLUSTER: htc
             JOBID PARTITION     NAME     USER ST       TIME  NODES NODELIST(REASON)
          10734140       htc   tunnel  gnowmik  R    1:36:58      1 htc-n77
[gnowmik@login3 vscode_tunnel]$ scancel -M htc 10734140
[gnowmik@login3 vscode_tunnel]$ squeue -M htc -u $USER
CLUSTER: htc
             JOBID PARTITION     NAME     USER ST       TIME  NODES NODELIST(REASON)
[gnowmik@login3 vscode_tunnel]$ squeue -M gpu -u $USER
CLUSTER: gpu
             JOBID PARTITION     NAME     USER ST       TIME  NODES NODELIST(REASON)
           3416144      l40s   tunnel  gnowmik  R      11:04      1 gpu-n59
[gnowmik@login3 vscode_tunnel]$ scancel -M gpu 3416144
[gnowmik@login3 vscode_tunnel]$ squeue -M gpu -u $USER
CLUSTER: gpu
             JOBID PARTITION     NAME     USER ST       TIME  NODES NODELIST(REASON)
Related
-
Browser access
Code Server, VNC, and other apps through Open OnDemand.
-
Set up SSH keys
Passwordless SSH, required for the remote tunnel.
-
Interactive sessions
Other ways to get a shell on a compute node.