Interactive / Remote Computing with VS Code
1. Code Server
Code server refers to a technology that enables running Visual Studio Code (VS Code) on a remote server and accessing it through a web browser. This setup provides a consistent development environment accessible from various devices, including laptops, tablets, and even low-powered machines. https://github.com/coder/code-server
Launching a Code-Server
Logon ondemand.htc.crc.pitt.edu, click Interactive Apps -> Code Server. Choose code server version, select Number of cores, Number of hours and Working Directory. Click Launch.

A new Code server session will automatically be created on one of the HTC compute nodes. Once the session has been created, start the session.

Installing Code-Server Extensions
You can install any desired extensions from the Extensions sidebar on the left-hand side. This only needs to be done the first time you run Code Server, or whenever you need new extensions. I demonstrate installing Jupyter extensions. Search “Jupyter” from EXTENSIONS: MARKETPLACE, select a specific extension. Click “Install”

The extensions will be installed under ~/.local/share/code-server.
Now you can open Jupyter Notebooks.

Using customized conda environments in Code-Server
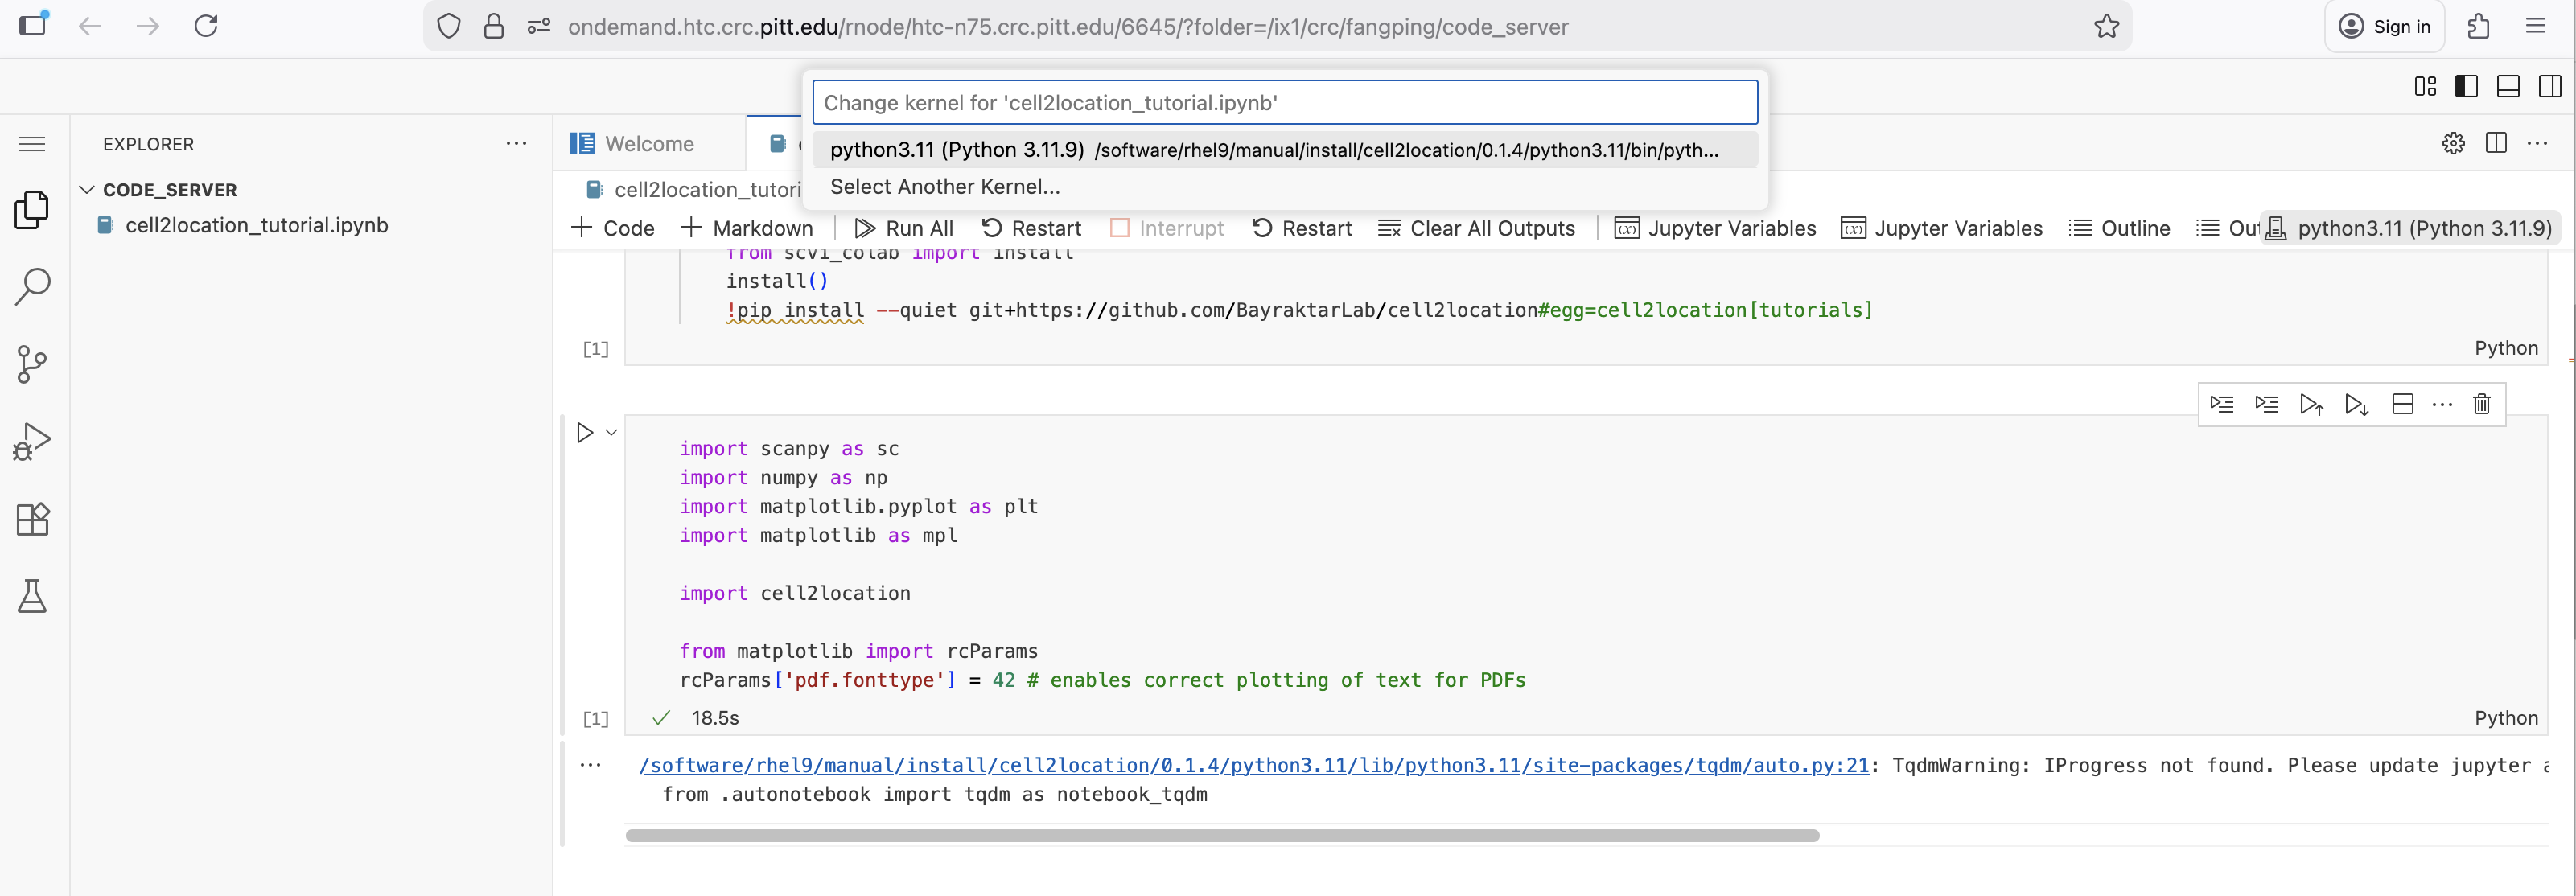
When your Jupyter notebooks depend on a customized conda environment, you can use customized conda environments in VS Code-Server. We have installed cell2location conda environment at /software/rhel9/manual/install/cell2location/0.1.4/python3.11, which can be used to execute the codes in the above Jupyter notebook.
If you have not installed the basic Python extension, install Python extension for Visual Studio Code.

Start Command Palette…

Type "Python: Select Interpreter" in the Command Palette and select this option.

Type “/software/rhel9/manual/install/cell2location/0.1.4/python3.11/bin/python”, and Choose this Conda Environment. Now you can use this conda environment to execute the codes in the cell2location tutorial Jupyter notebook.
2. VSCode via VNC
Logon ondemand.htc.crc.pitt.edu, click Interactive Apps -> VSCode on htc. Choose VSCode version, select Number of cores and Number of hours. Click Launch. You will run VSCode inside a TurboVNC session.

3. Tunneling
This tutorial outlines how to set up VS Code for interactive/remote development/debugging on Pitt CRCD computing nodes.
Prerequisites
- The latest version of VS Code installed on your local machine
- Latest version of the "Remote Development" extension pack
Steps performed only once
Add the following lines to the ssh config file on your local machine (~/.ssh/config)
and replace
Host htc
  ControlMaster auto
  ControlPath ~/.ssh/master-%r@%h:%p
  HostName htc.crc.pitt.edu
  User <name>

Host htcx
  ProxyCommand ssh htc 'nc $(squeue --me --name=tunnel --states=R -h -O NodeList,Comment)'
  StrictHostKeyChecking no
  User <name>
For users on a Windows machine, the ControlMaster may not be available, so add the following lines instead:
Host htc
  HostName htc.crc.pitt.edu
  User <name>

Host htcx
  ProxyCommand ssh htc "nc $(squeue --me --name=tunnel --states=R -h -O NodeList,Comment)"
  StrictHostKeyChecking no
  User <name>
Connect to the HTC cluster and create the following sbatch file into your home directory (~/tunnel.sbatch):
#!/bin/bash

#SBATCH --output="tunnel.log"
#SBATCH --job-name="tunnel"
#SBATCH --time=4:00:00 # walltime
#SBATCH --cpus-per-task=2 # number of cores
#SBATCH --mem-per-cpu=8G # memory per CPU core

# load the modules
module load python/ondemand-jupyter-python3.8

# find open port
PORT=$(python -c 'import socket; s=socket.socket(); s.bind(("", 0)); print(s.getsockname()[1]); s.close()')
scontrol update JobId="$SLURM_JOB_ID" Comment="$PORT"

# start sshd server on the available port
echo "Starting sshd on port $PORT"
/usr/sbin/sshd -D -p ${PORT} -f /dev/null -h ${HOME}/.ssh/id_rsa
In the terminal on your local machine, generate an ssh key if you don't have one already using the following:
ssh-keygen -t rsa
ssh-copy-id htc
htc.crc.pitt.edu, run the following commands if you have not done so:
ssh-keygen #then follow on screen instructions
cd ~/.ssh
cat id_rsa.pub >> authorized_keys
Steps performed every time to connect your VS Code to the cluster
From your local terminal, connect to the cluster using ssh htc and once logged in, type sbatch tunnel.sbatch to start the remote server. Make sure that your job does run!
Sample output:
[user@login0b ~]$ sbatch tunnel.sbatch
Submitted batch job 1383495
[user@login0b ~]$ squeue -u user

  JOBID      PARTITION      NAME      USER      ST      TIME      NODES      NODELIST(REASON)
1383495            htc    tunnel      user       R      0:17          1           htc-1024-n0
Open VS Code on your local machine and connect to your projects using Remote Explorer with htcx as the ssh target.
Changes you need to do to allocate resources with GPUs
Add the following host to the ssh config file on your local machine (~/.ssh/config) and
replace <name> with your username:
Host gpux
  ProxyCommand ssh htc 'nc $(squeue -M gpu --me --name=tunnel --states=R -h -O NodeList,Comment)'
  StrictHostKeyChecking no
  User <name>
Change the contents of the sbatch file in your home directory on HTC (~/tunnel.sbatch) to:
#!/bin/bash
#SBATCH --output="tunnel.log"
#SBATCH --job-name="tunnel"
#SBATCH --cpus-per-task 2
#SBATCH --time 0-01:00:00
#SBATCH --clusters=gpu
#SBATCH --partition=a100
#SBATCH --gres=gpu:1

module load python/ondemand-jupyter-python3.8 # load the modules

# find open port
PORT=$(python -c 'import socket; s=socket.socket(); s.bind(("", 0));
print(s.getsockname()[1]); s.close()')
scontrol update JobId="$SLURM_JOB_ID" Comment="$PORT"
# start sshd server on the available port
echo "Starting sshd on port $PORT"
/usr/sbin/sshd -D -p ${PORT} -f /dev/null -h ${HOME}/.ssh/id_rsa